Sto's thoughts
==============

# I 3D-printed an adapter to put my Sesame smart lock on my door

Apr 16, 2019

*Originally posted [on Imgur](https://imgur.com/a/6JifUNG) on April 16, 2019. This post brings the story, photos, and videos together here on the blog.*

I backed [Candy House Inc.'s Sesame Kickstarter project](https://www.kickstarter.com/projects/candyhouse/sesame-your-key-reinvented) in 2015. Unfortunately, by the time I received my pledge rewards at the beginning of 2017, I had moved, and the lock didn't fit my new door and lock.

I stored the locks until I realized Candy House was 3D-printing adapters for some of its Amazon customers. Unfortunately, they didn't want to help me: their answer was to buy their new, smaller model made for Japan. So I took the problem into my own hands. If you're interested in the lock itself, here's [Candy House's website](https://candyhouse.co/).

<div class="flex-centered">
  <figure>
  <a href="/images/2019-04-16/sesame-smart-lock.jpg" target="_blank">
  <img alt="Sesame smart lock with the printed adapter before installation" class="image" src="/images/2019-04-16/sesame-smart-lock.jpg" />
</a>

  <figcaption>
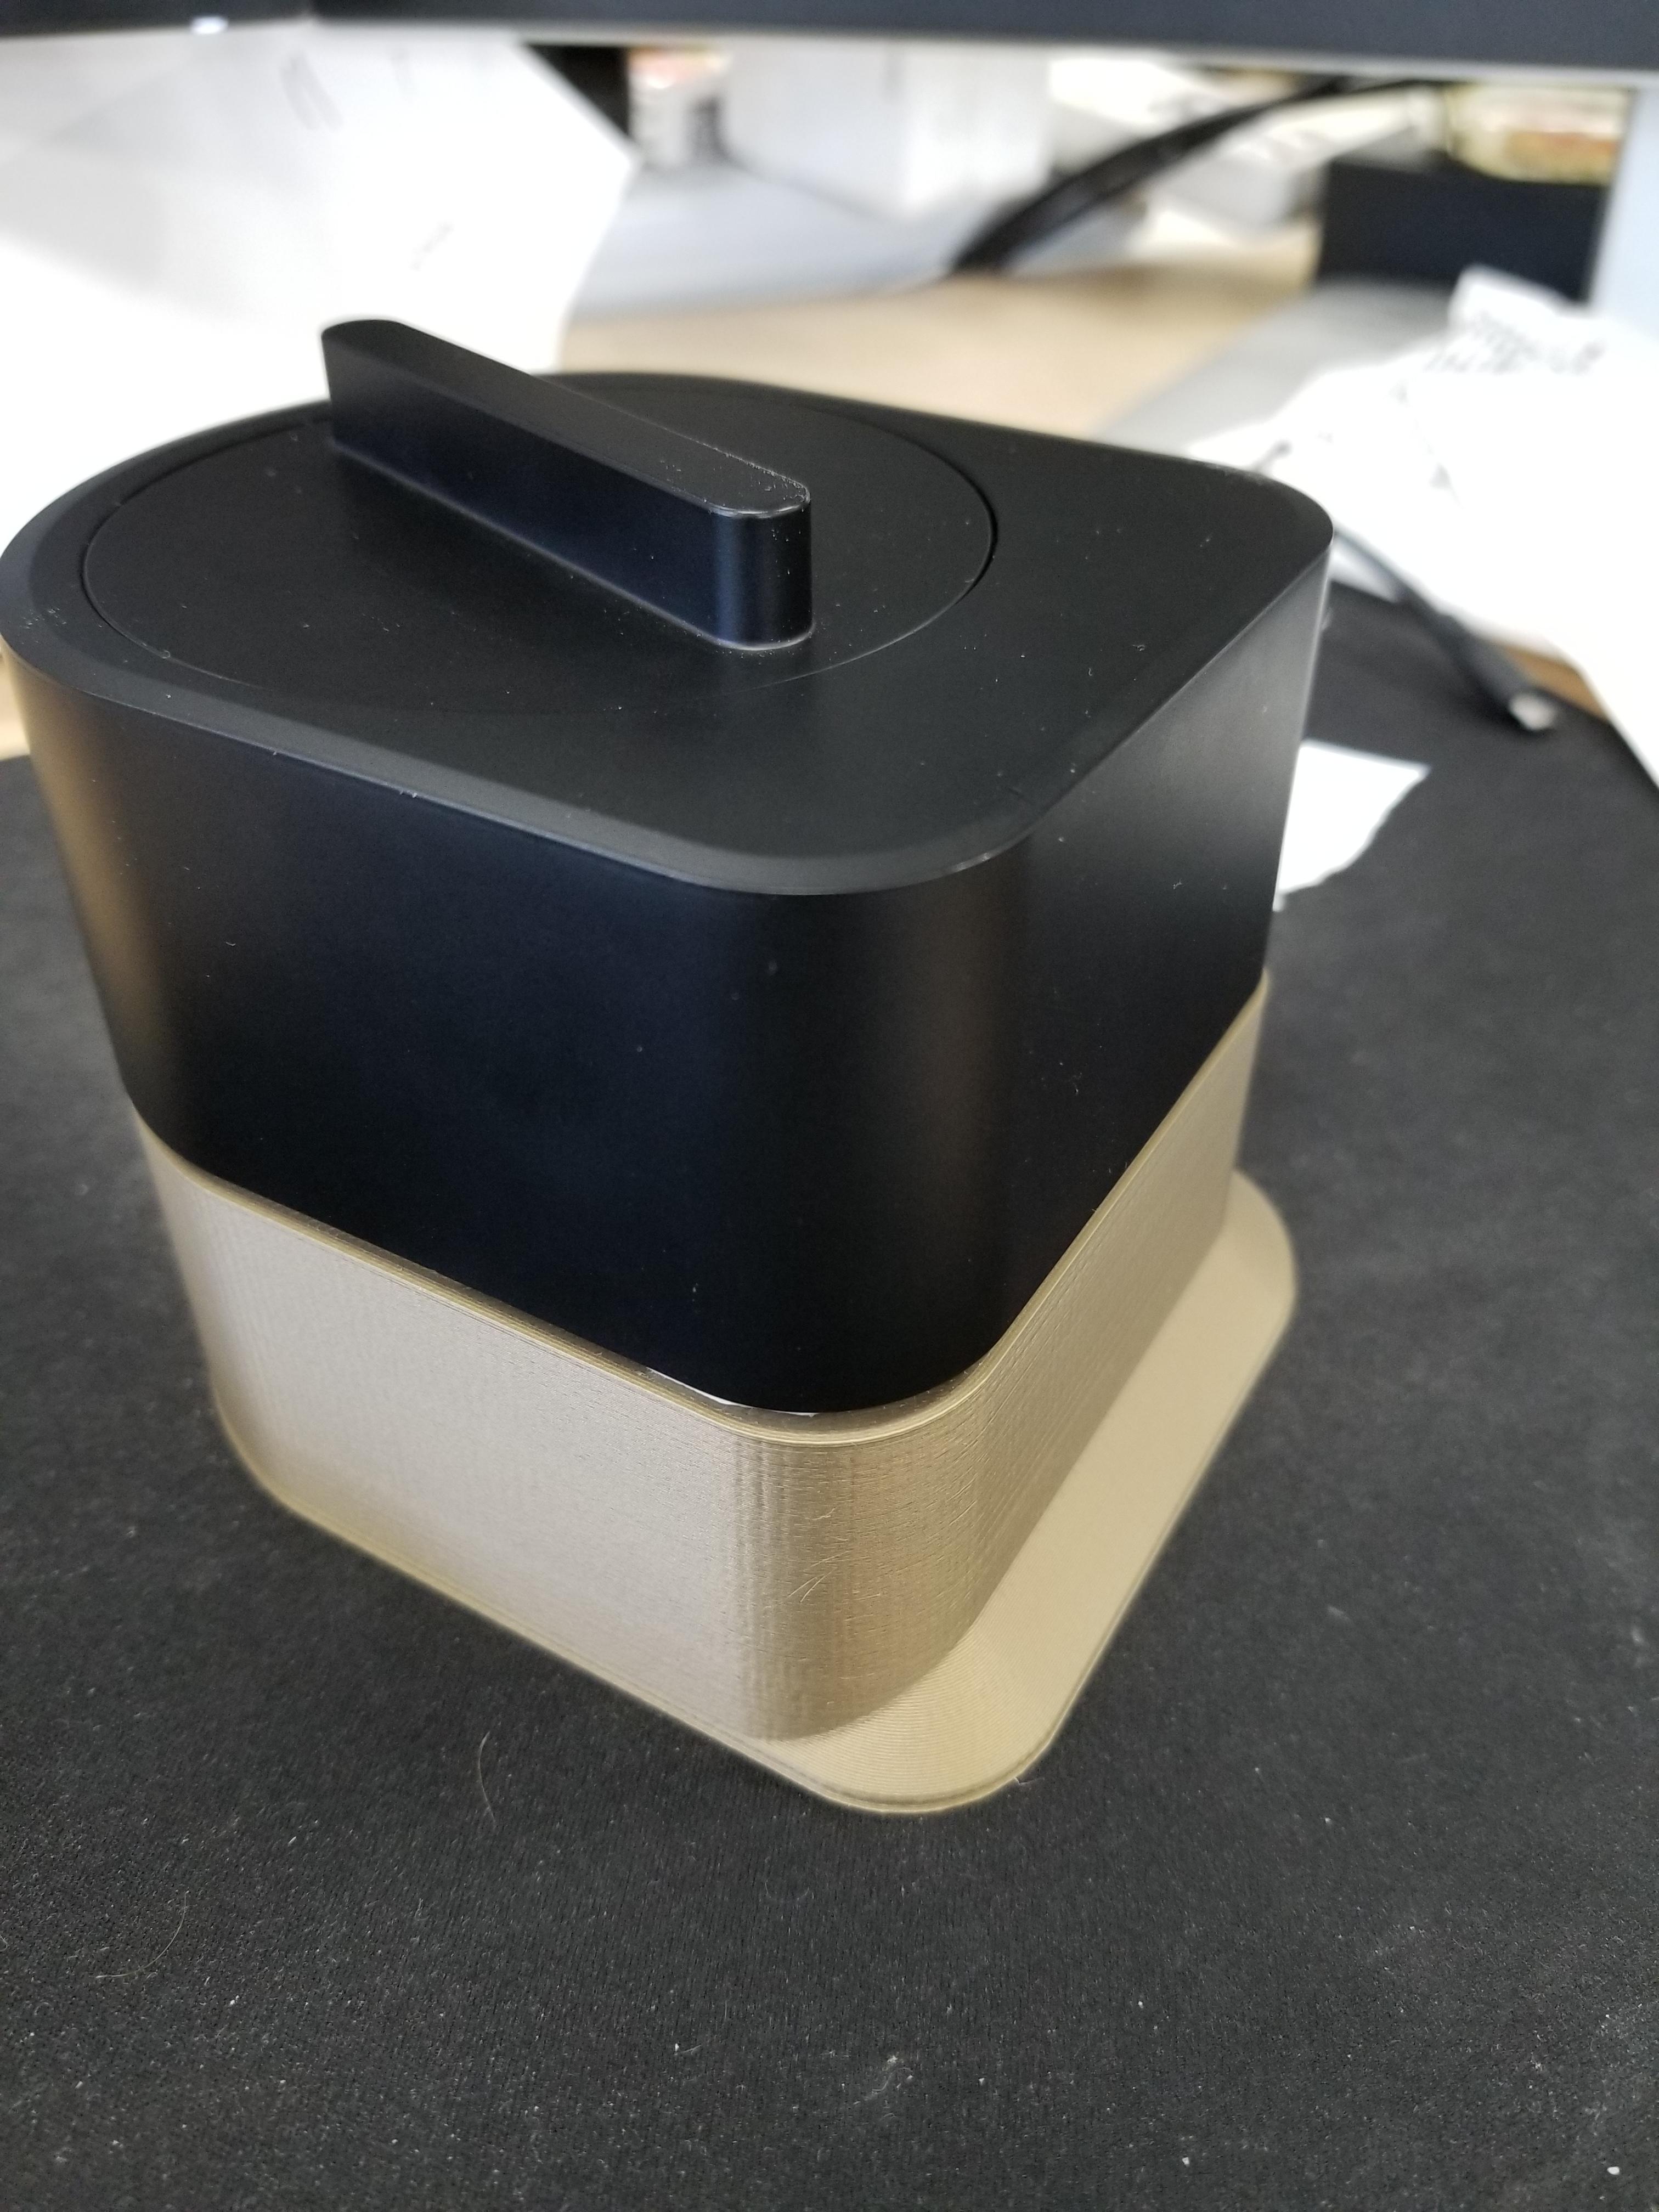
<p>The Sesame smart lock with its new adapter.</p>
</figcaption>
</figure>

</div>

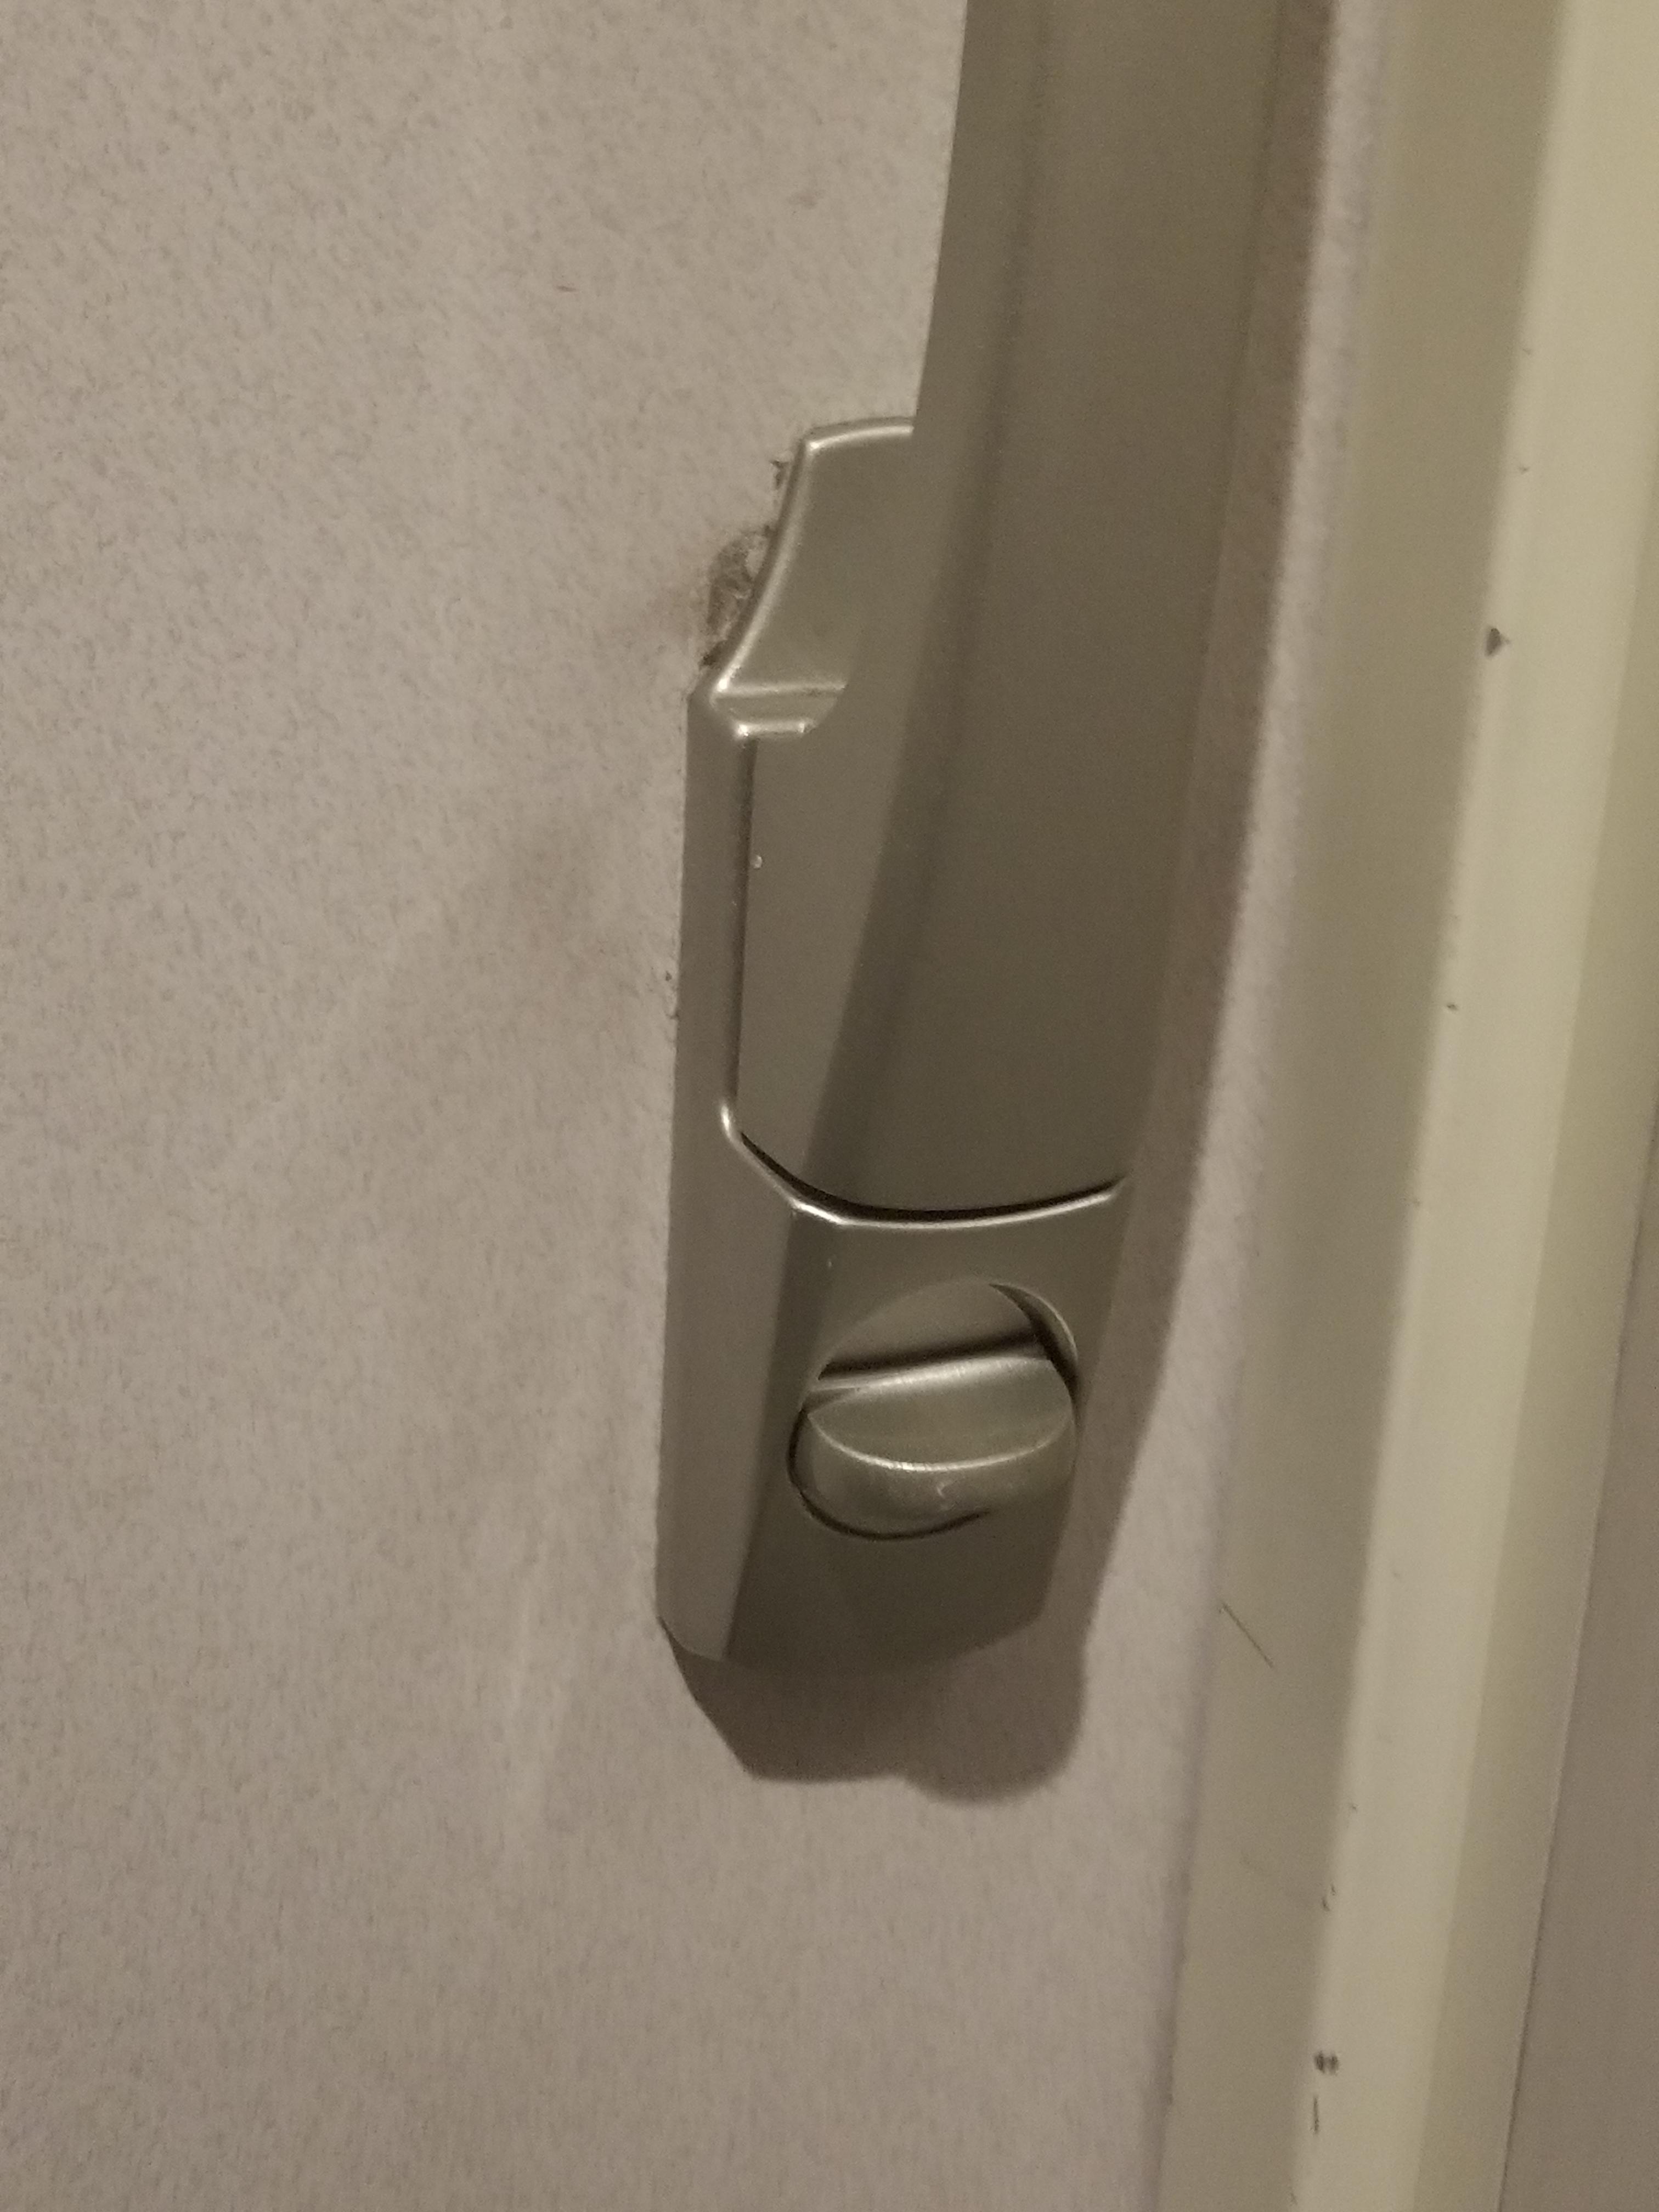
This is what my door handle and lock look like. There is no flat surface on which I could stick the Sesame lock.

<div class="flex-centered">
  <figure>
  <a href="/images/2019-04-16/door-handle.jpg" target="_blank">
  <img alt="Curved door handle surrounding the existing thumbturn" class="image" src="/images/2019-04-16/door-handle.jpg" />
</a>

  <figcaption>
<p>No flat surface to attach the smart lock to.</p>
</figcaption>
</figure>

</div>

## Designing the adapter

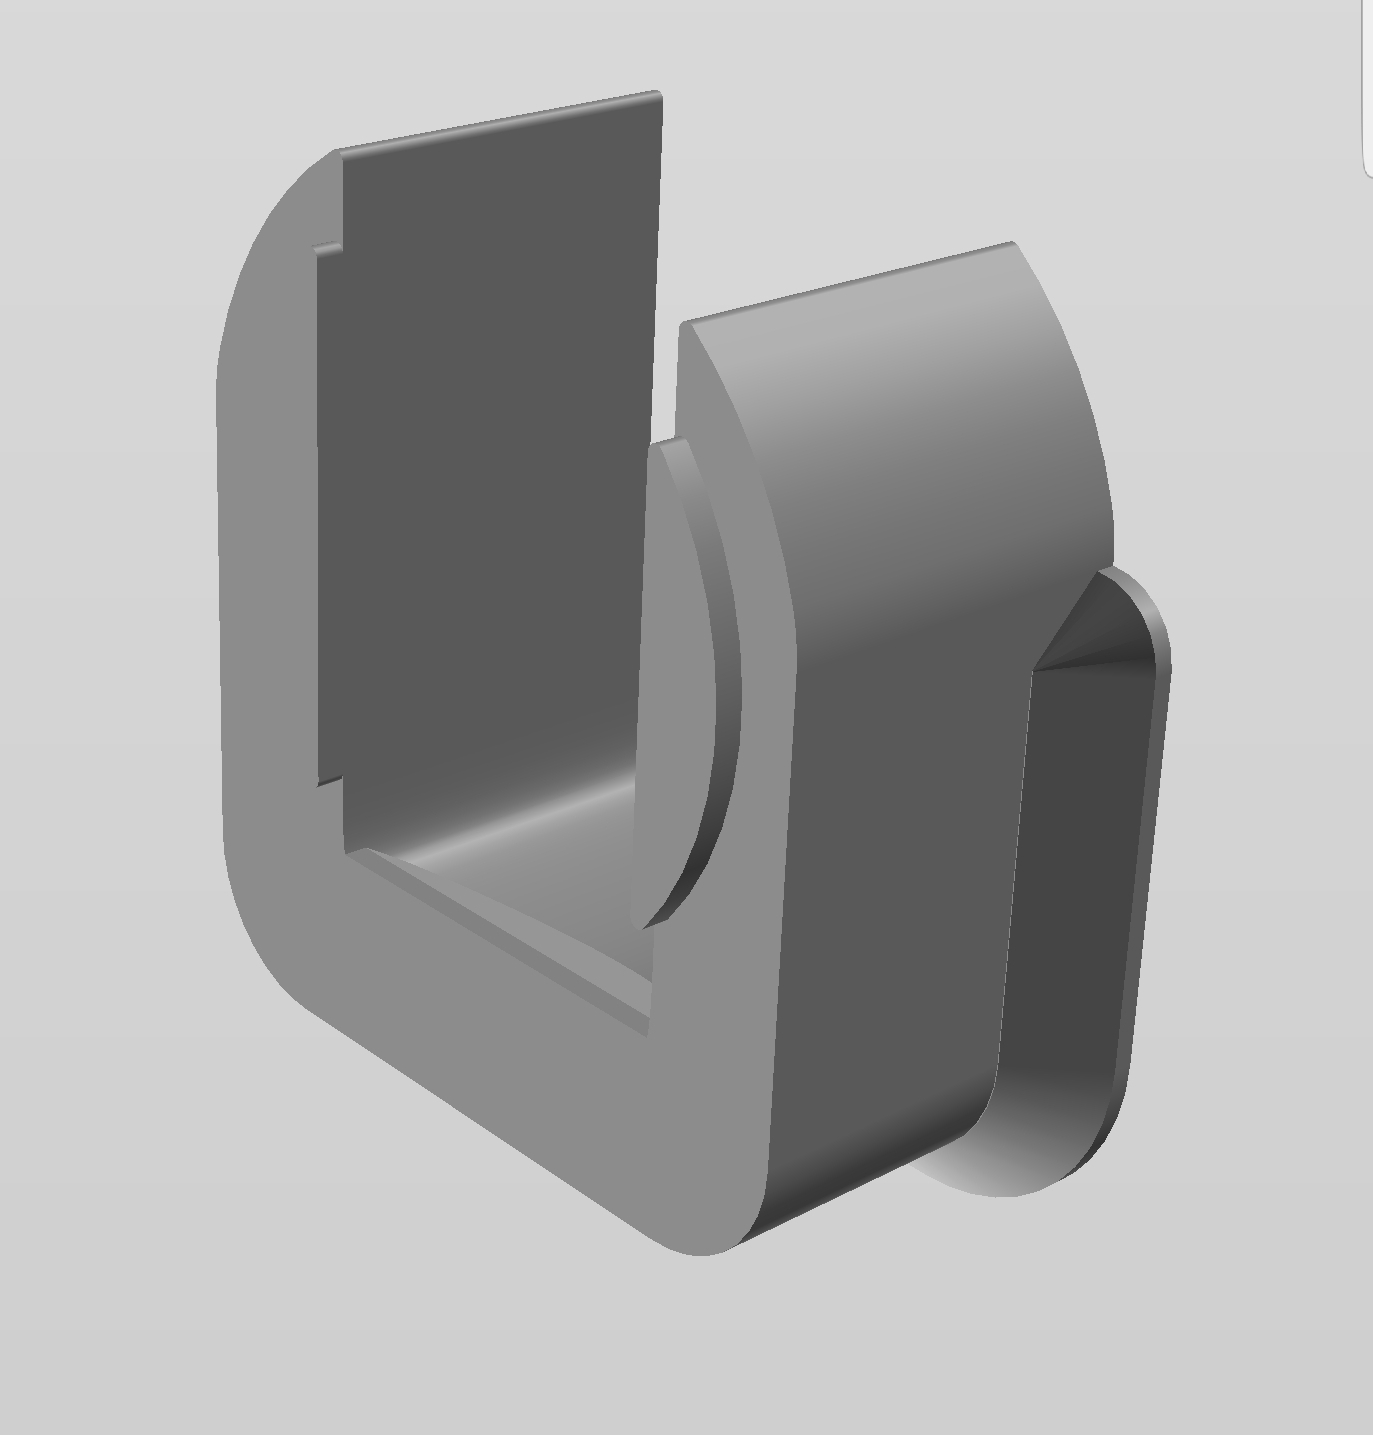
I designed the adapter in Autodesk Fusion 360. It was my first time using the software, so it took me some time, but it was fun and I learned a lot.

<div class="flex-centered">
  <figure>
  <a href="/images/2019-04-16/adapter-design.jpg" target="_blank">
  <img alt="Fusion 360 model of the adapter housing" class="image" src="/images/2019-04-16/adapter-design.jpg" />
</a>

  <figcaption>
<p>The final adapter design in Fusion 360.</p>
</figcaption>
</figure>

  <figure>
  <a href="/images/2019-04-16/thumbturn-design.jpg" target="_blank">
  <img alt="Fusion 360 model of the thumbturn extension" class="image" src="/images/2019-04-16/thumbturn-design.jpg" />
</a>

  <figcaption>
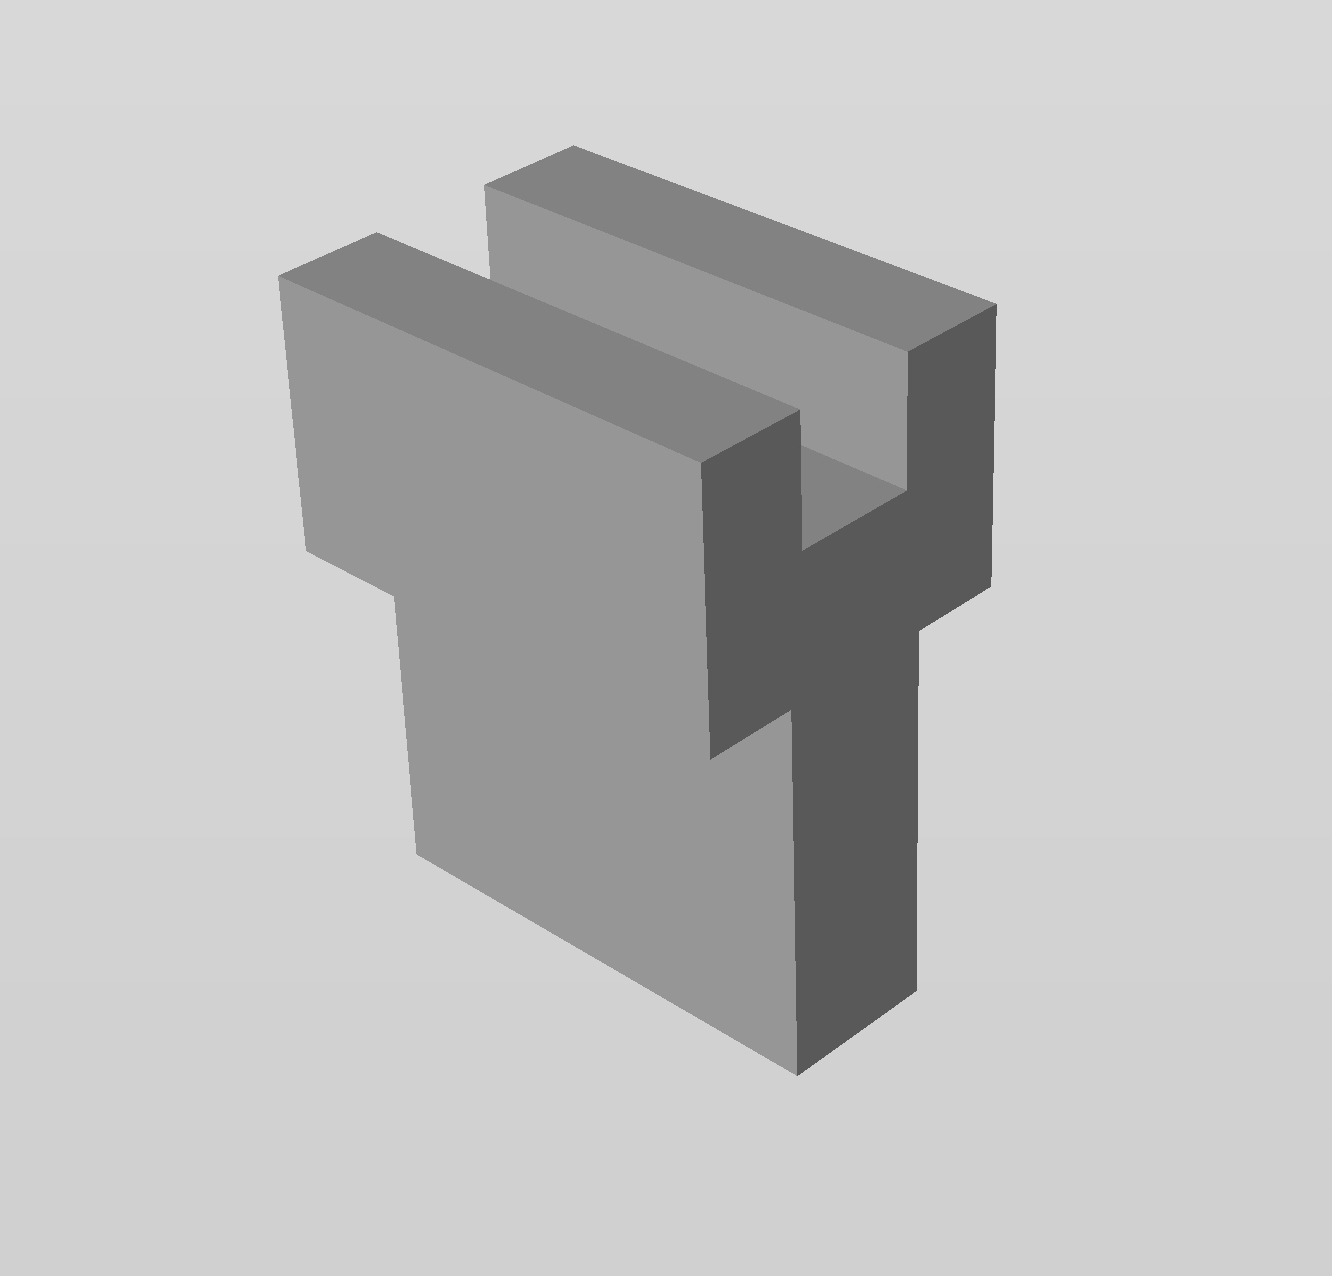
<p>This part extends the rotating knob.</p>
</figcaption>
</figure>

</div>

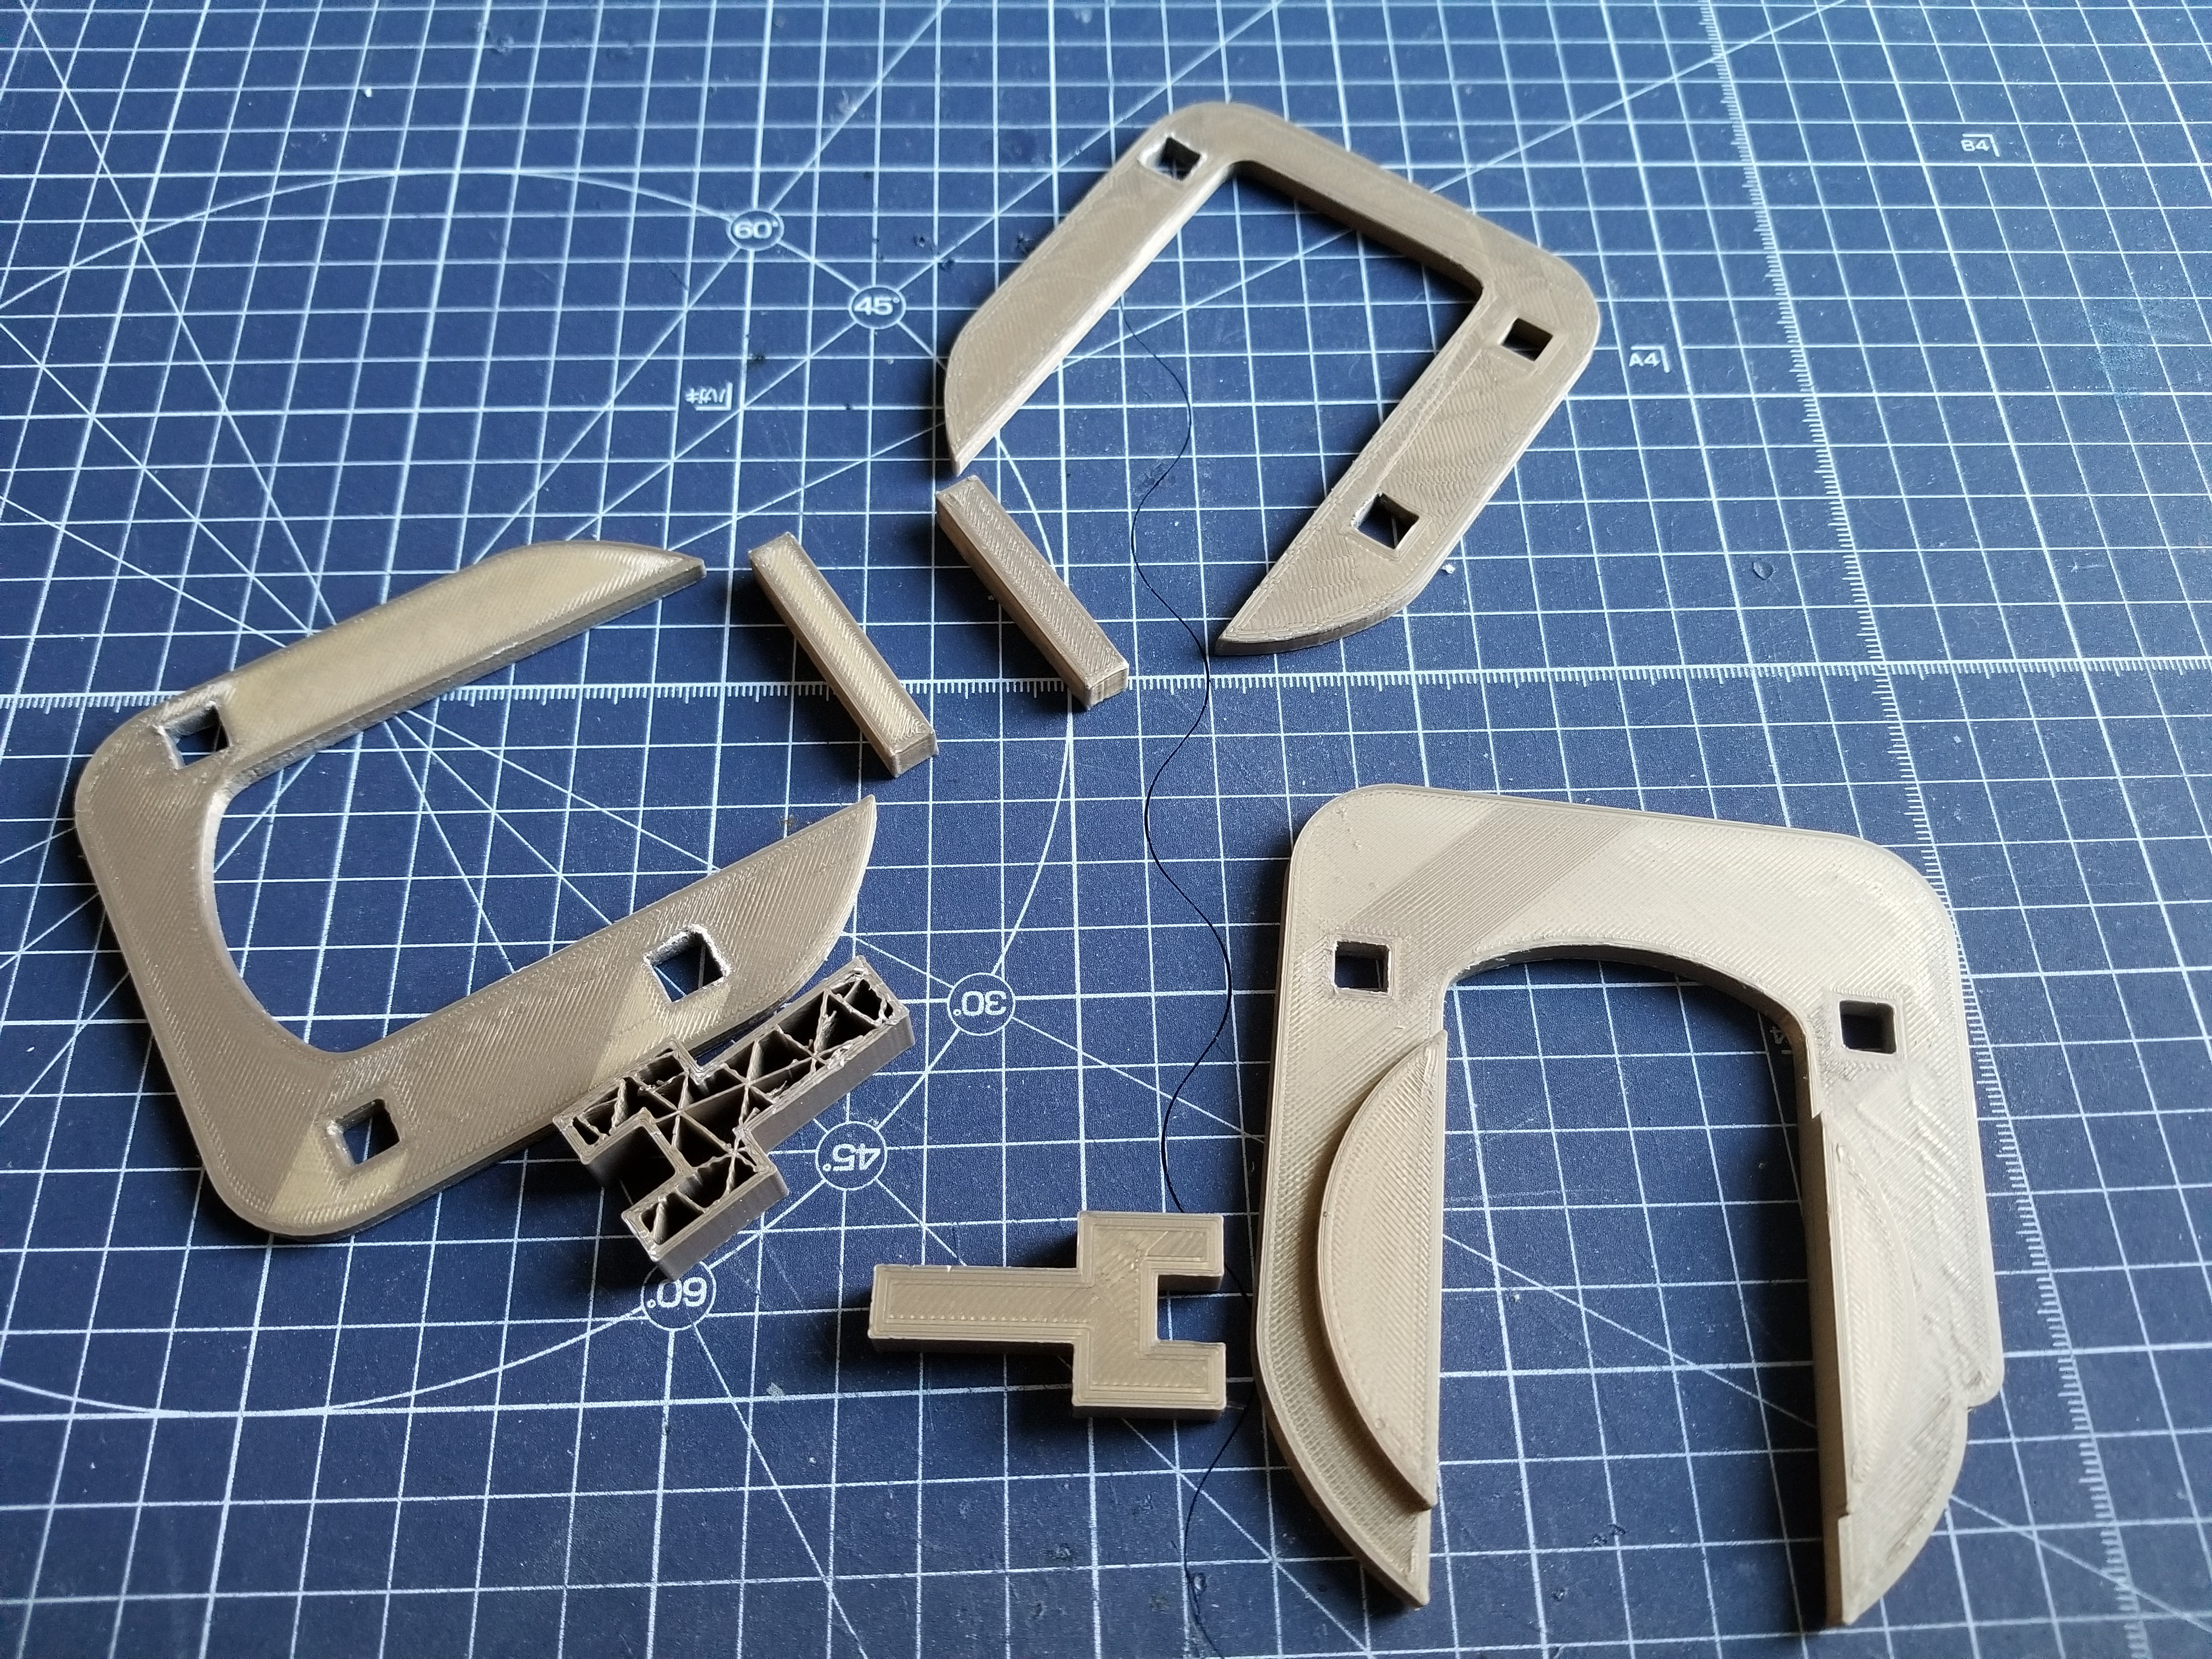
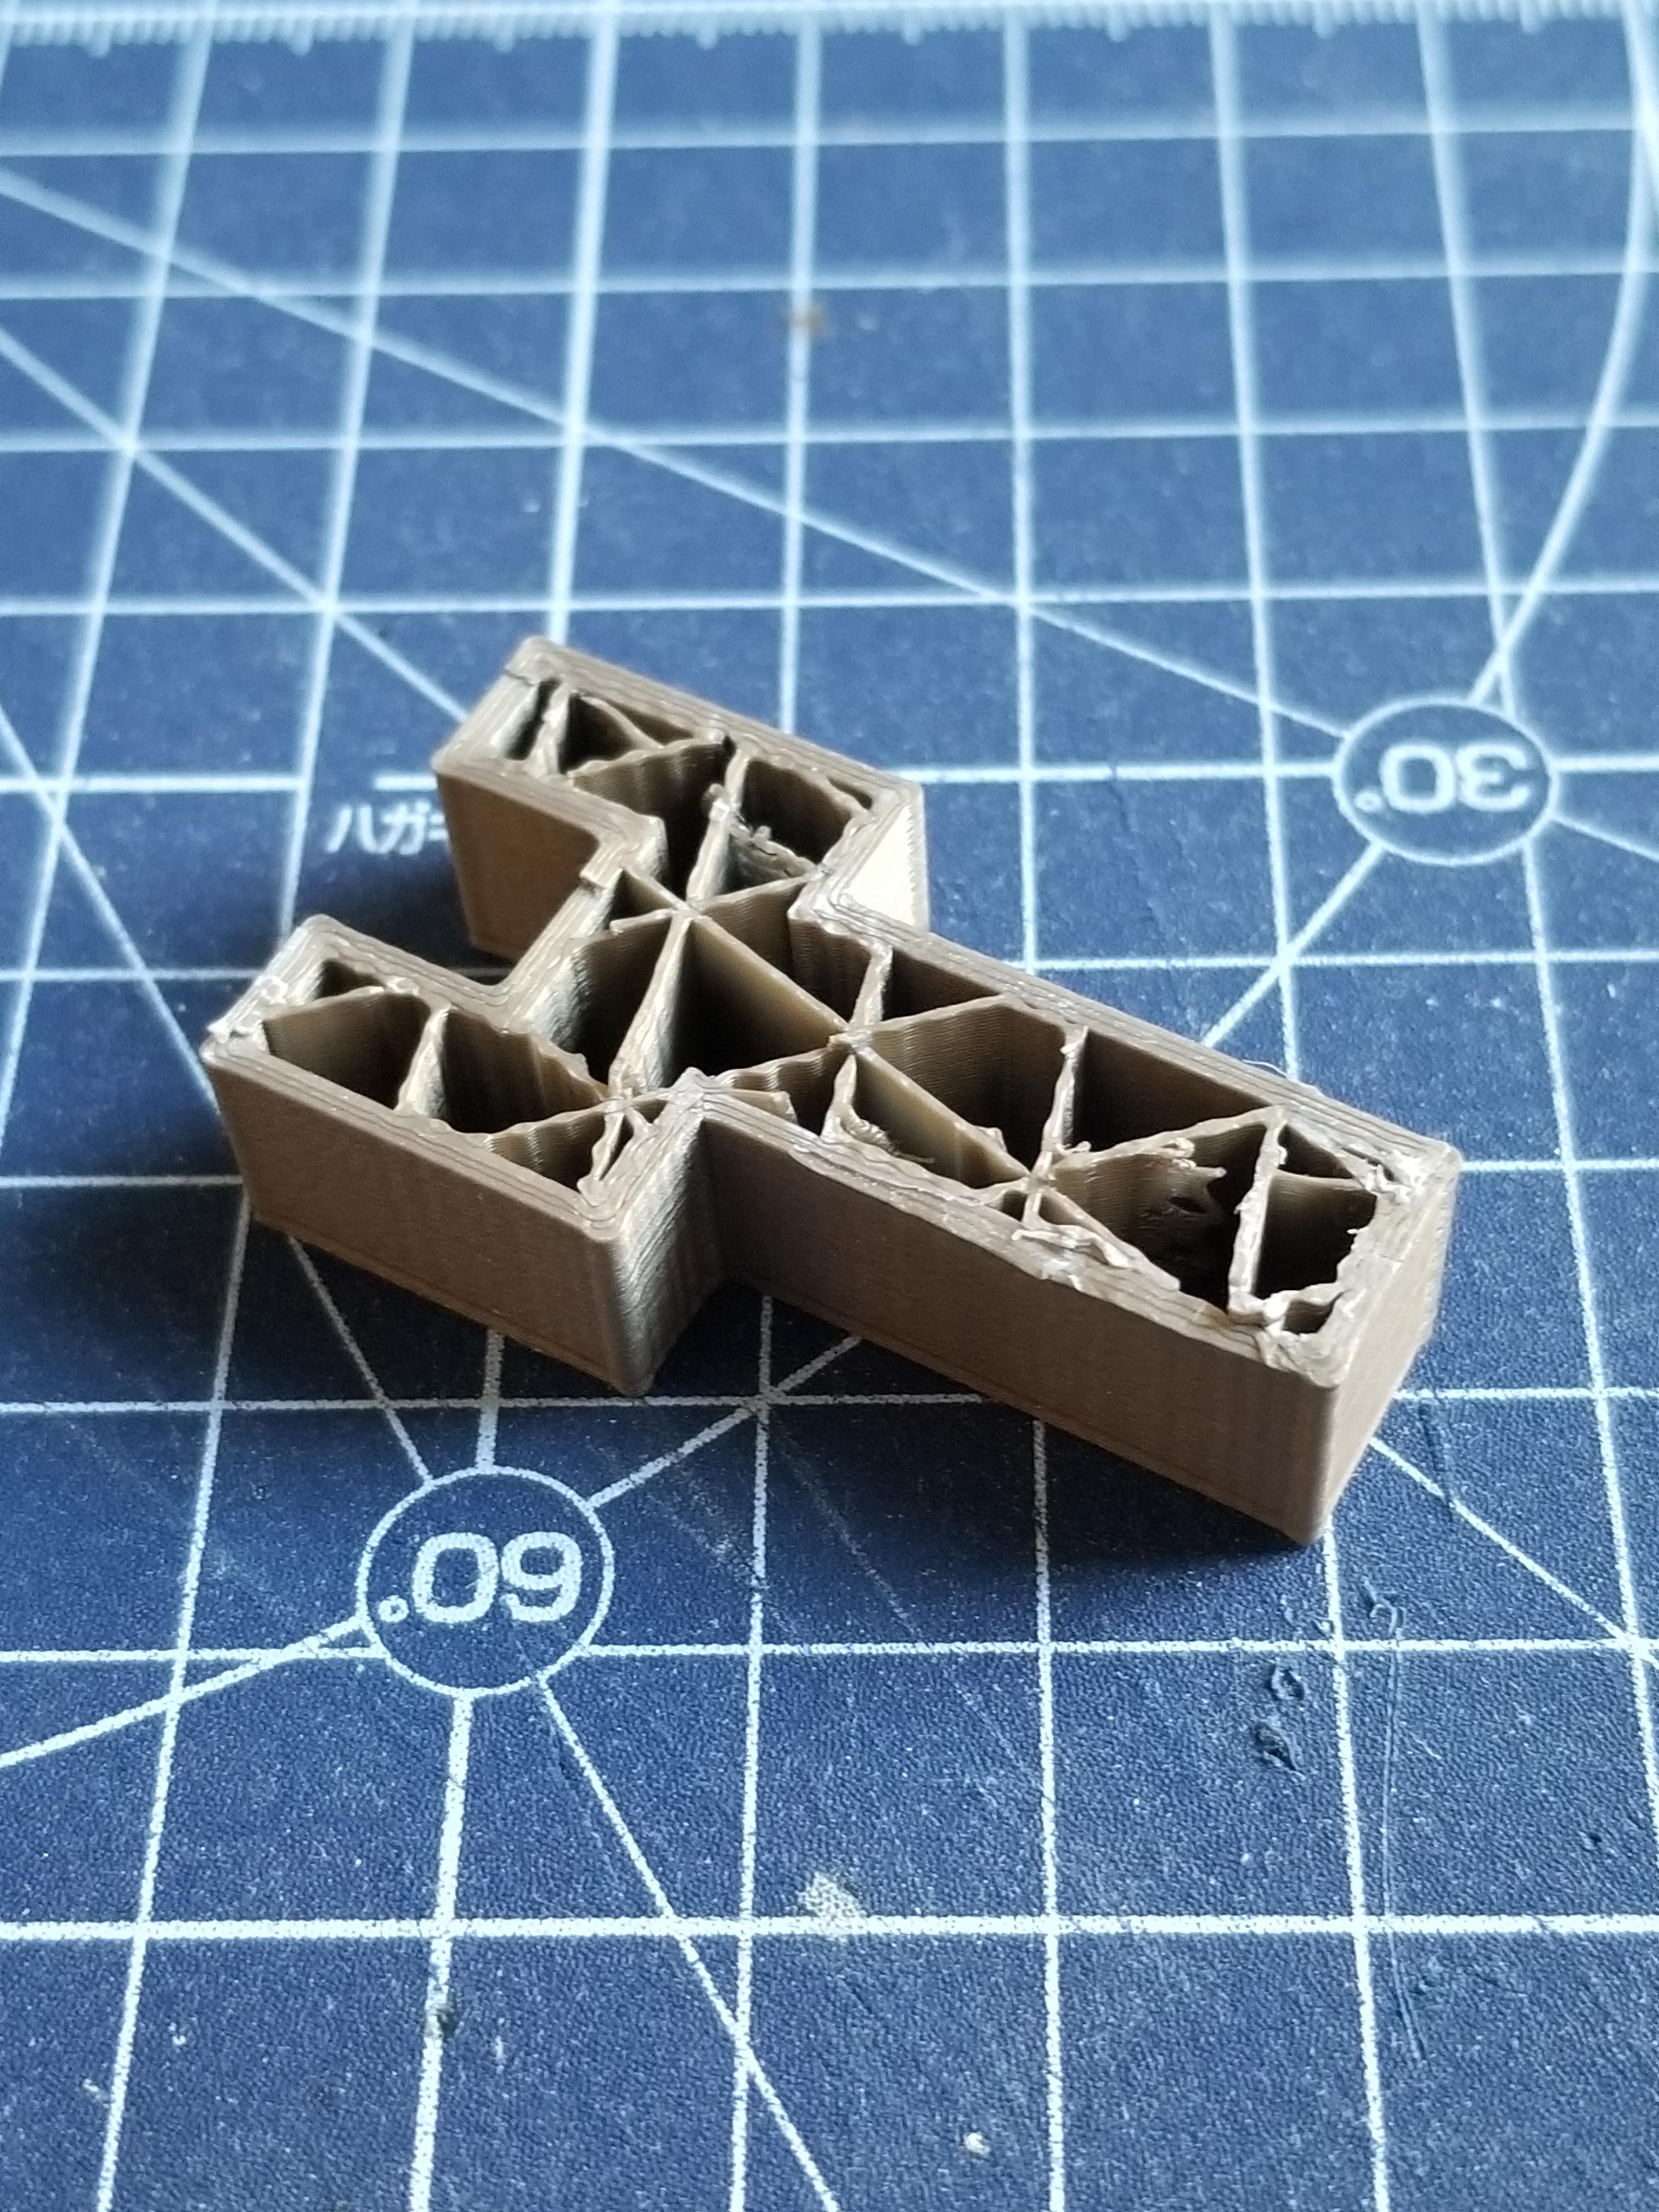
Rather than printing the whole design, which takes four to five hours, on every iteration, I only printed thinner parts that allowed me to confirm the dimensions and fit.

<div class="flex-centered">
  <figure>
  <a href="/images/2019-04-16/test-prints.jpg" target="_blank">
  <img alt="Thin test prints used to check the adapter dimensions" class="image" src="/images/2019-04-16/test-prints.jpg" />
</a>

  <figcaption>
<p>Test prints to check dimensions without waiting for the full print.</p>
</figcaption>
</figure>

</div>

I realized too late that changes to my design no longer allowed the knob to rotate inside the casing. However, I learned that it is fairly easy to separate layers, and I was able to make the part shorter without reprinting it.

<div class="flex-centered">
  <figure>
  <a href="/images/2019-04-16/shortened-thumbturn.jpg" target="_blank">
  <img alt="Thumbturn extension shortened by separating printed layers" class="image" src="/images/2019-04-16/shortened-thumbturn.jpg" />
</a>

  <figcaption>
<p>A shorter thumbturn extension, without a reprint.</p>
</figcaption>
</figure>

</div>

## Printing the final parts

The printer is an Ultimaker 3 Extended. My employer acquired it recently and built a whole "Fab room", as a few teams are getting into hardware prototyping. I was so happy to be allowed to use it!

<div class="flex-centered">
  <figure>
    <video controls muted loop playsinline preload="metadata" width="560" style="max-width: 100%; height: auto;" aria-label="Ultimaker 3 Extended printing the first layers of the adapter">
      <source src="/videos/2019-04-16/printing-first-layers.mp4" type="video/mp4">
      <a href="/videos/2019-04-16/printing-first-layers.mp4">Download the video of the first layers being printed.</a>
    </video>
    <figcaption>Printing the first few layers.</figcaption>
  </figure>
</div>

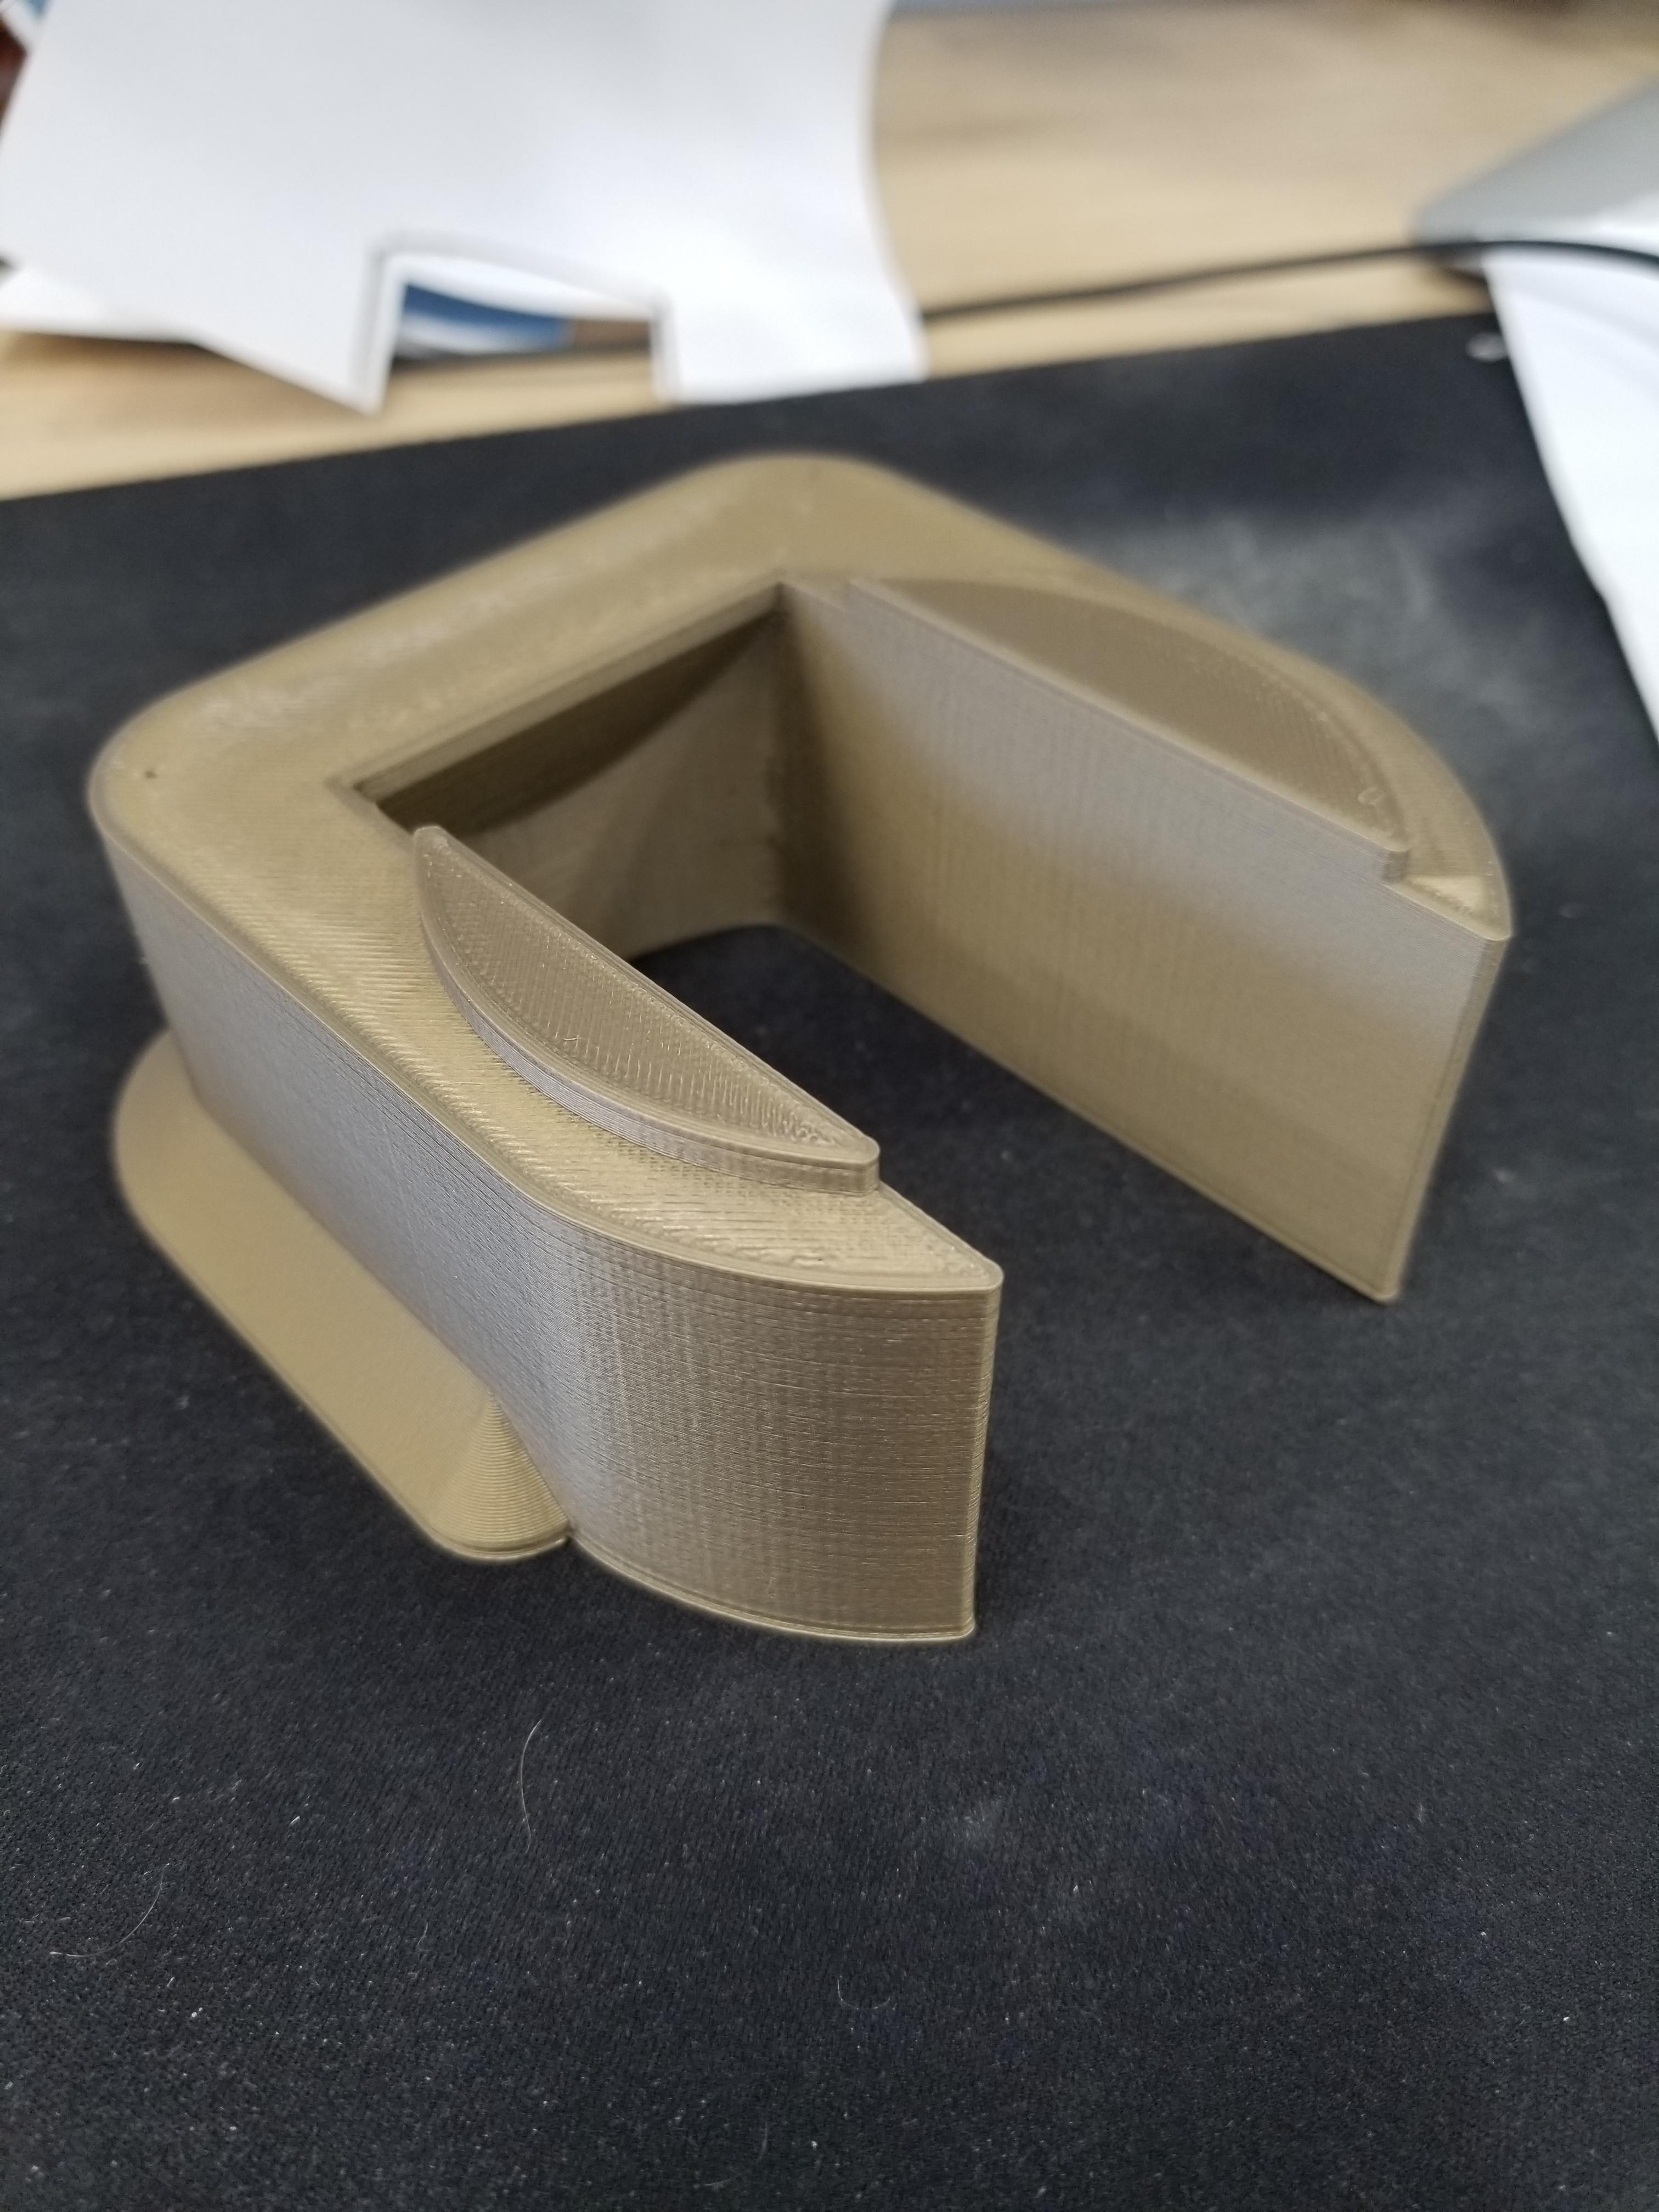
Five hours later, the print was done. Actually, this was the next morning, as I left it to print overnight. I used ABS "pearl gold" filament: that's what was loaded in the printer, and I didn't want to mess with the spools and settings.

<div class="flex-centered">
  <figure>
  <a href="/images/2019-04-16/finished-print.jpg" target="_blank">
  <img alt="Completed pearl gold ABS adapter" class="image" src="/images/2019-04-16/finished-print.jpg" />
</a>

  <figcaption>
<p>The finished print the next morning.</p>
</figcaption>
</figure>

</div>

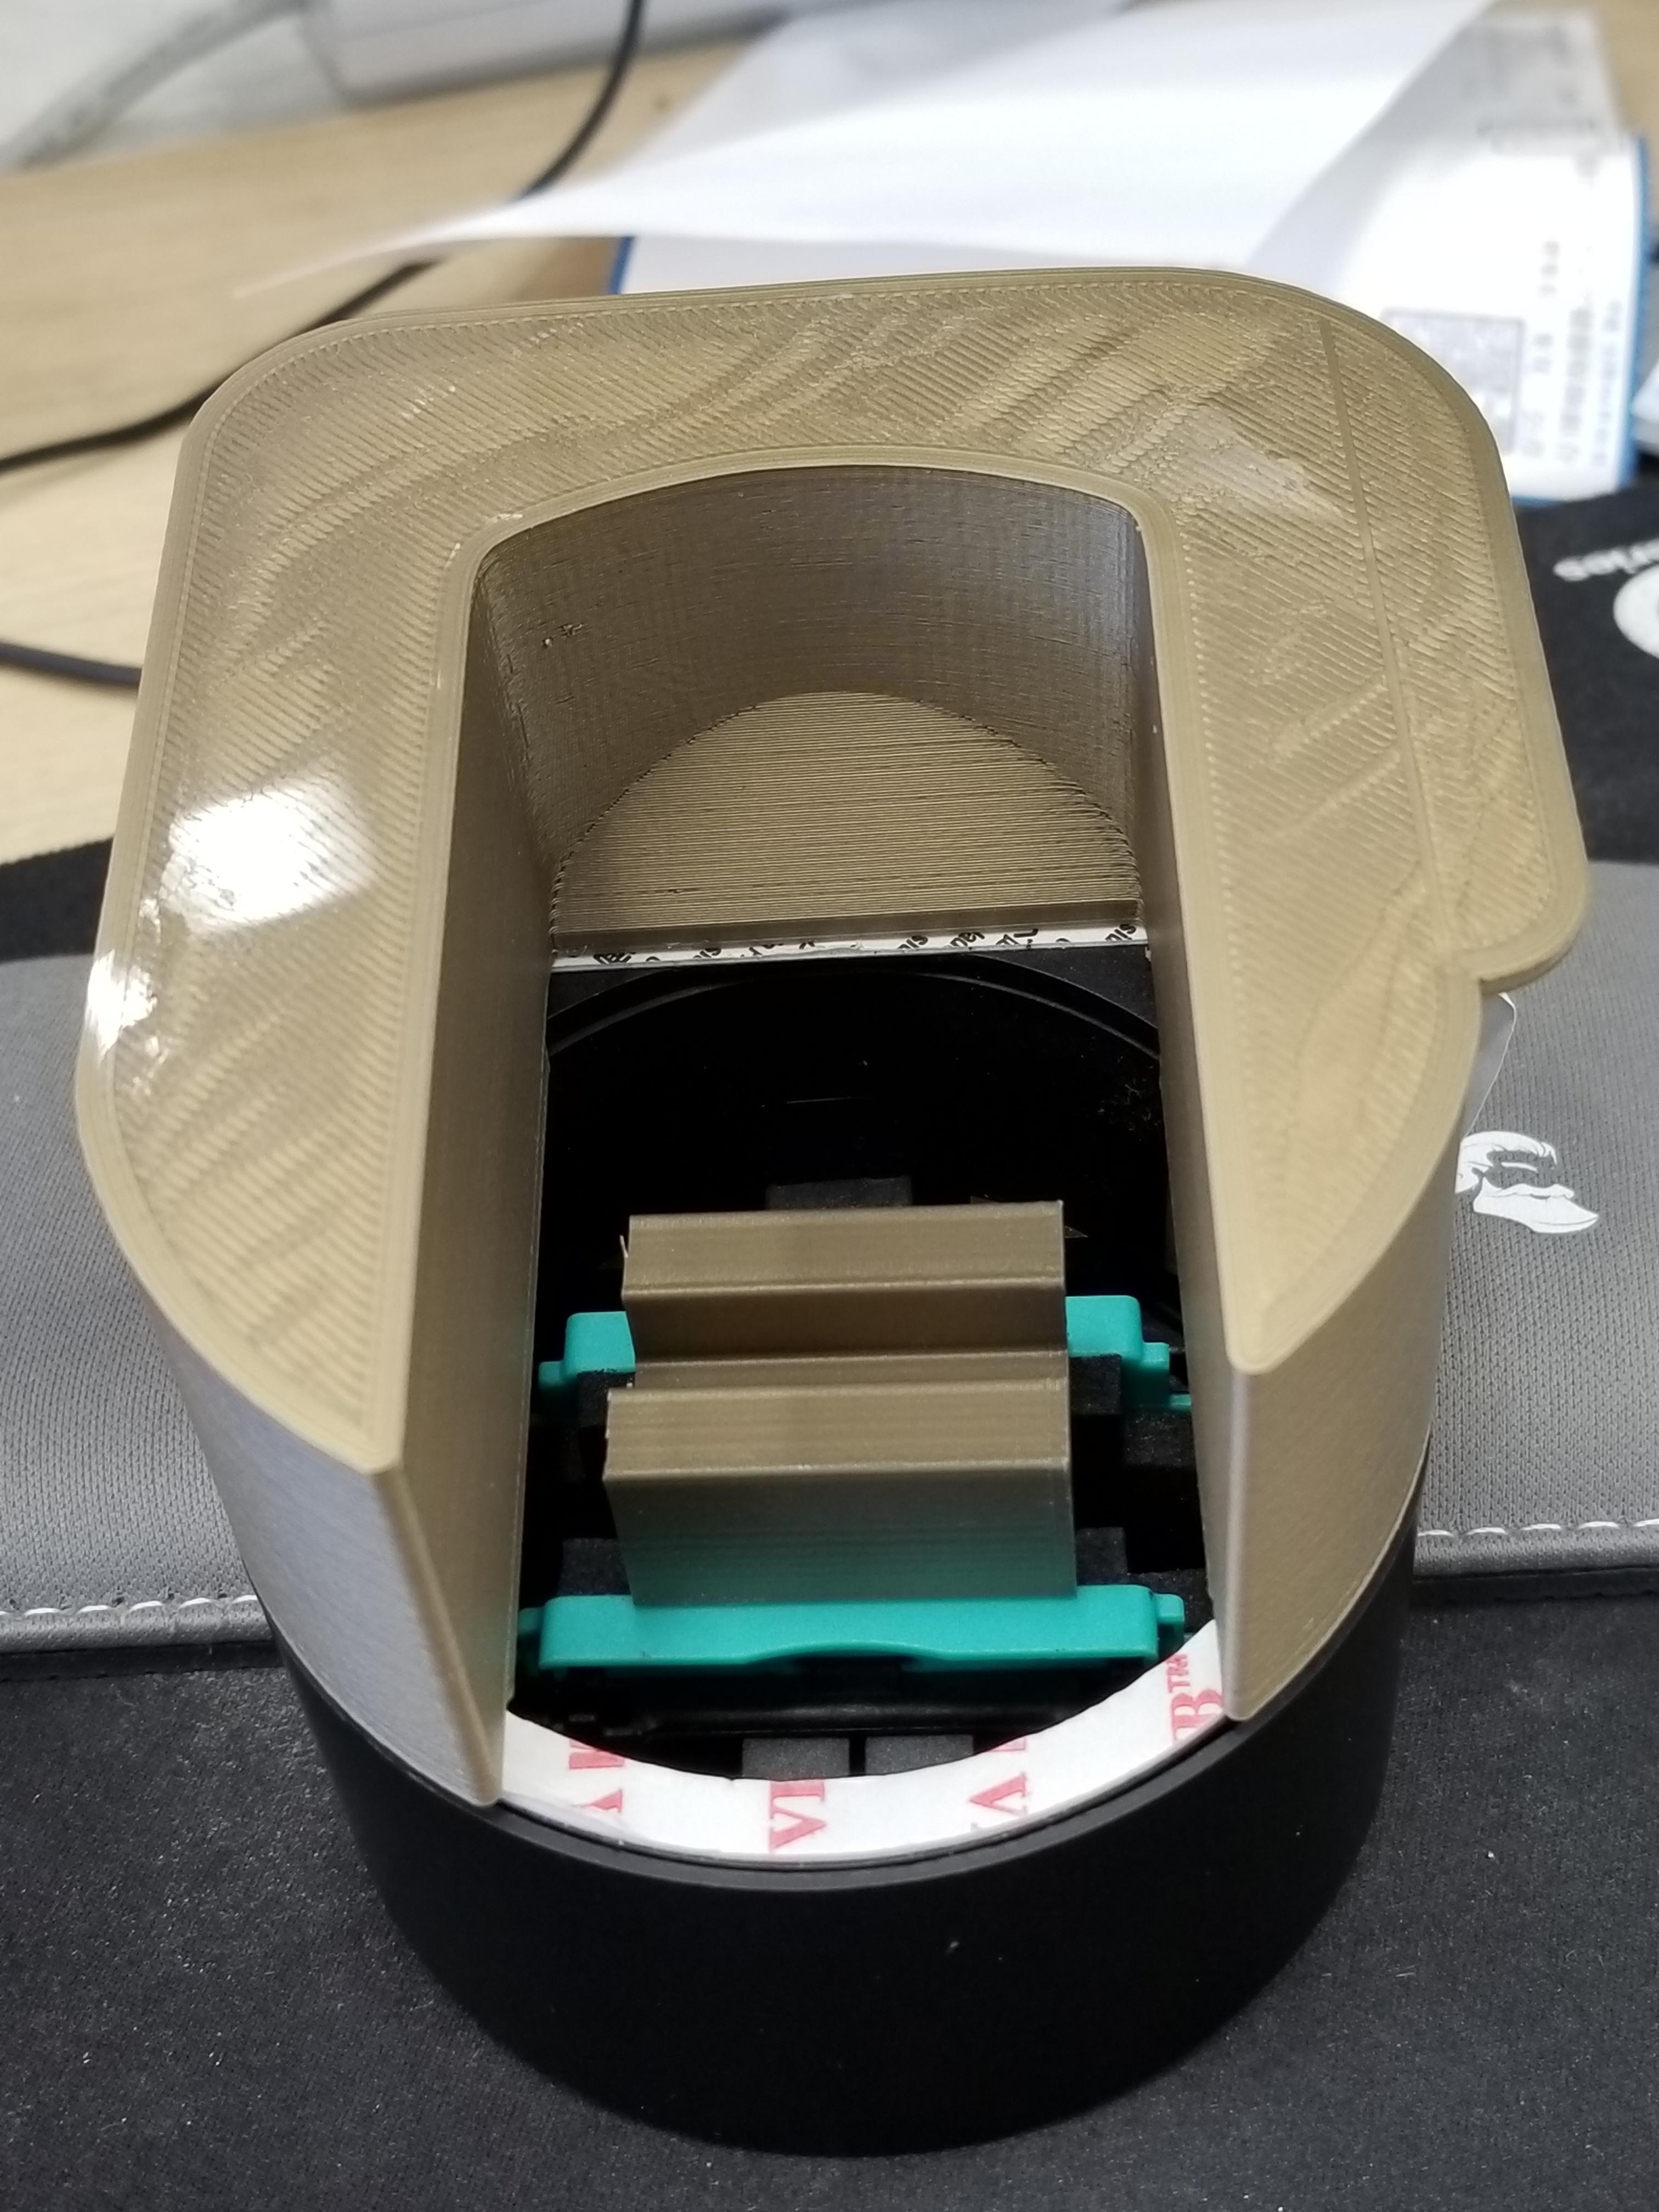
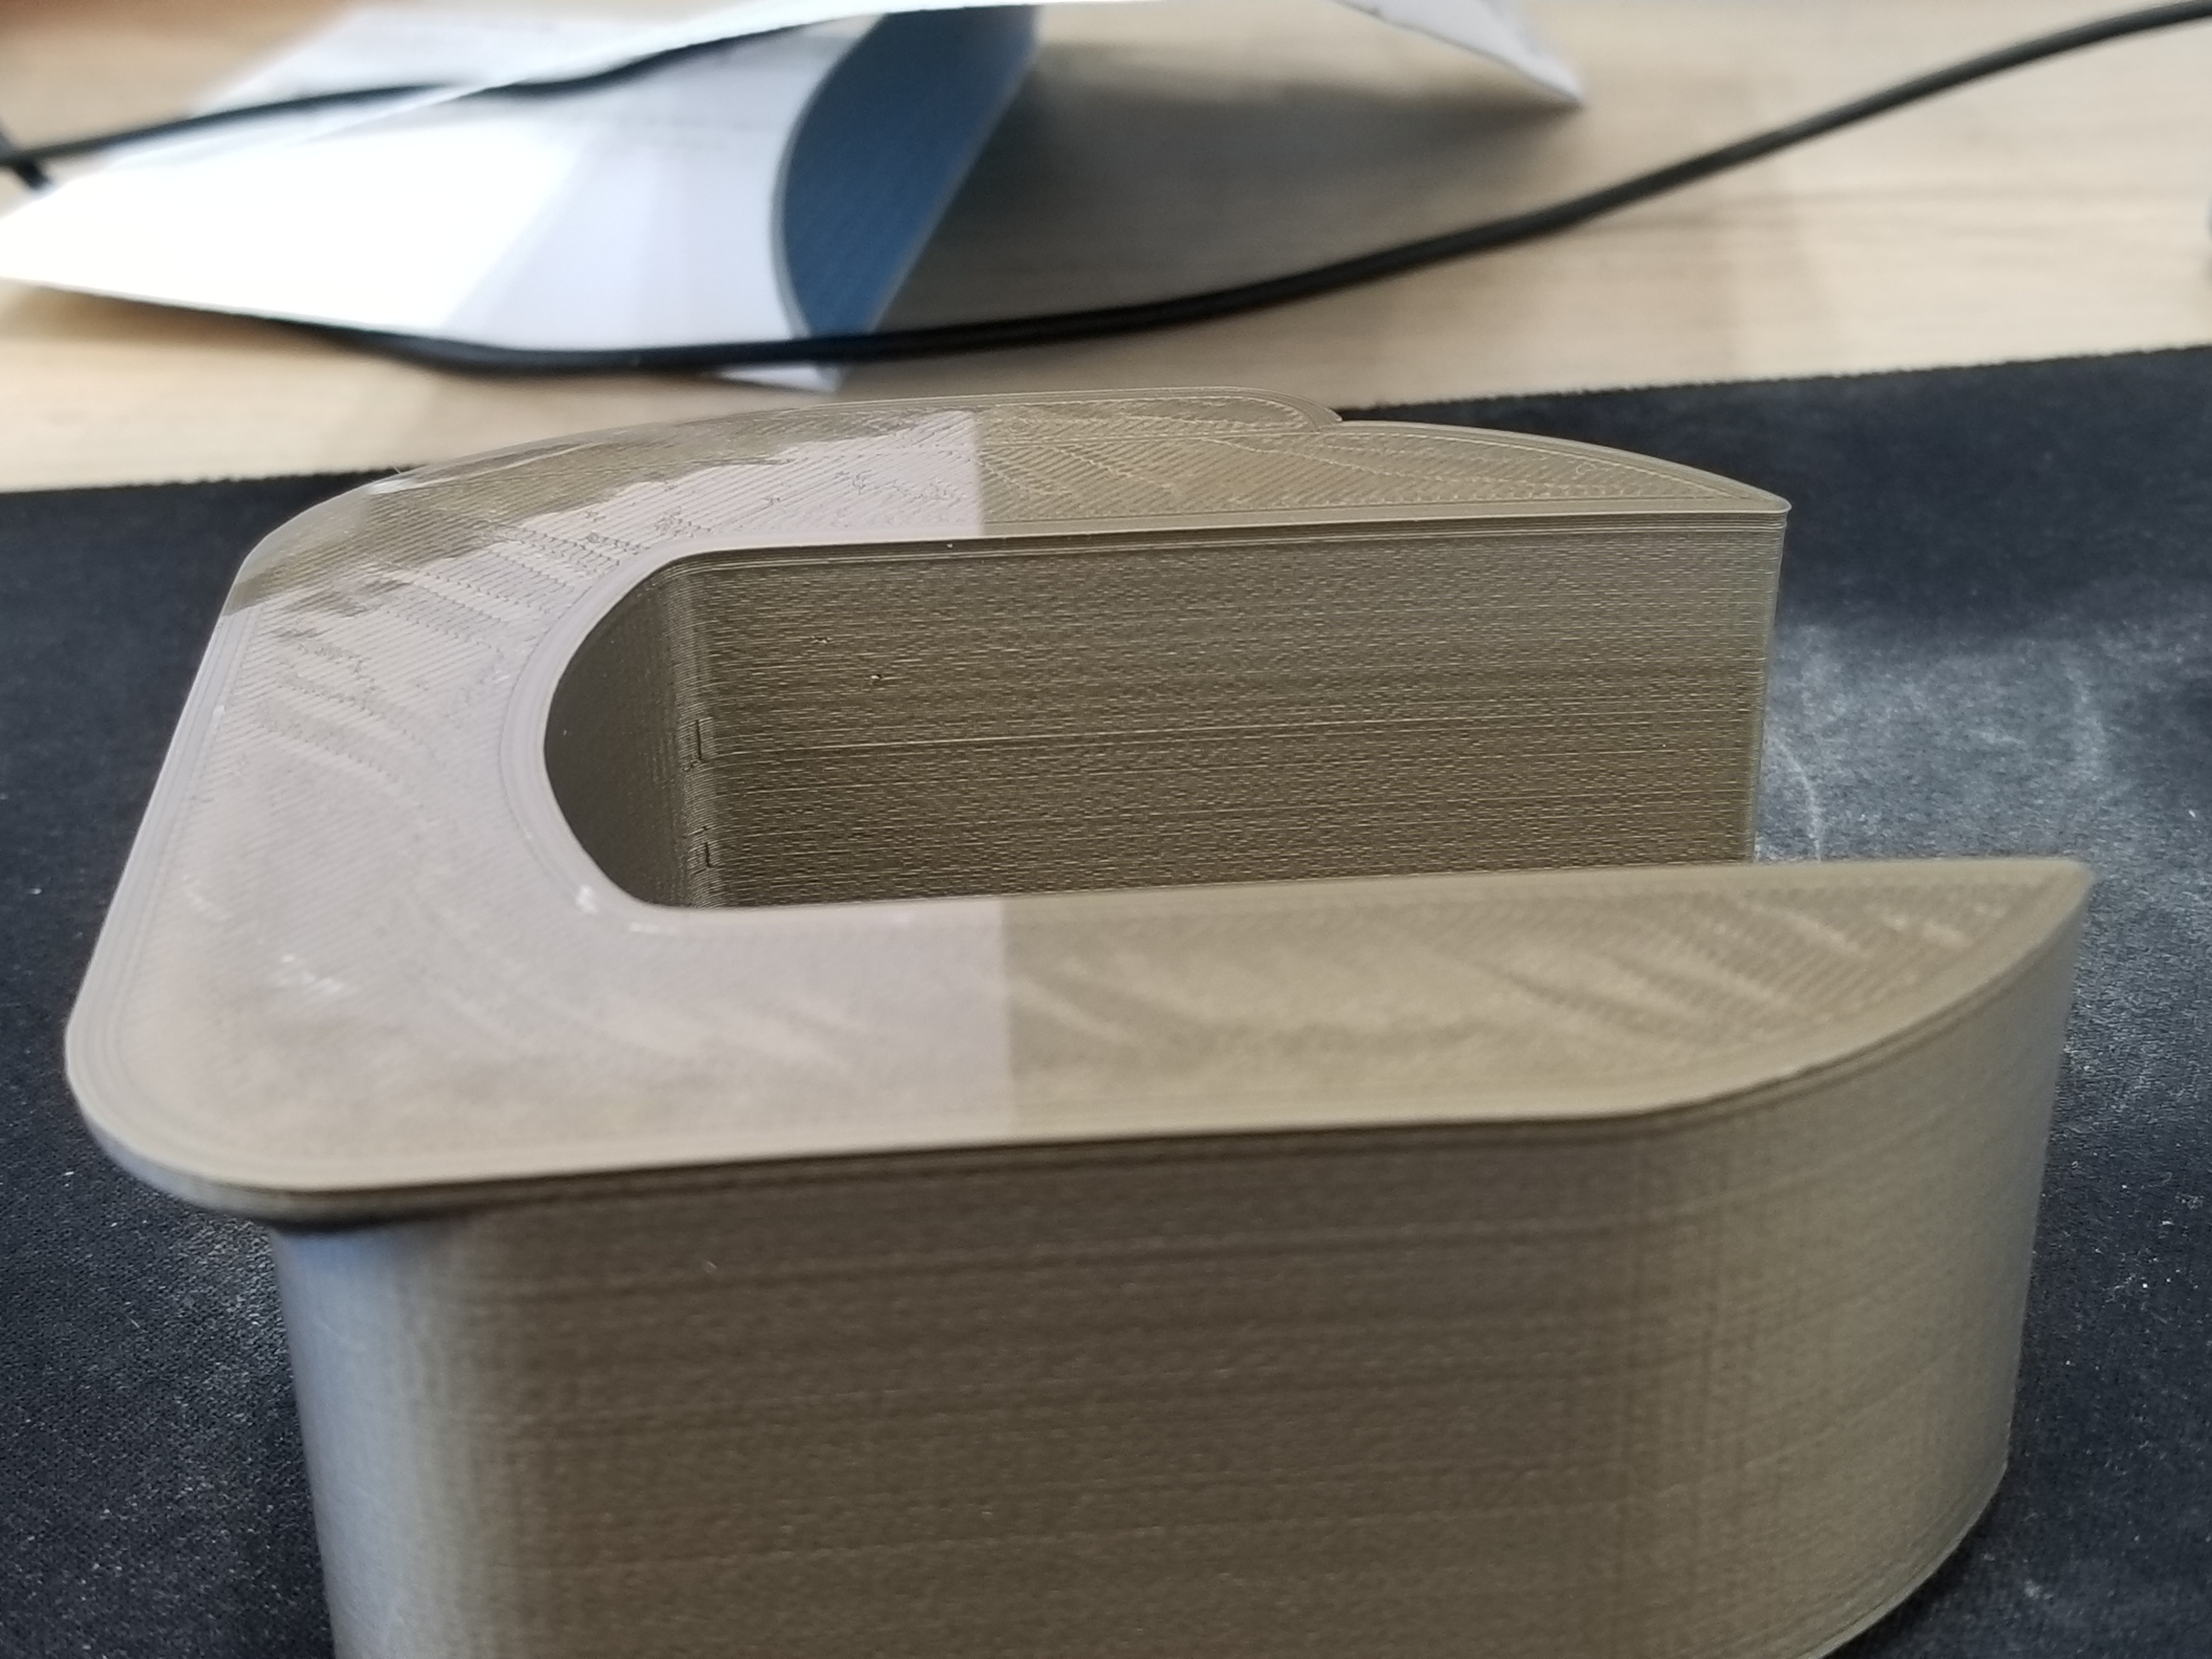
Here is the whole assembly seen from below. Three things stand out:

1. To reproduce the door handle's curve, I used paper, a marker, and a scanner.
2. The 30° overhang didn't require any supports and came out very clean.
3. The printed thumbturn part was initially too long, so I had to cut it shorter. You can see the rough edges on its left side.

<div class="flex-centered">
  <figure>
  <a href="/images/2019-04-16/assembly-from-below.jpg" target="_blank">
  <img alt="Adapter assembly seen from below with the thumbturn extension inside" class="image" src="/images/2019-04-16/assembly-from-below.jpg" />
</a>

  <figcaption>
<p>The curve, overhang, and shortened thumbturn extension.</p>
</figcaption>
</figure>

</div>

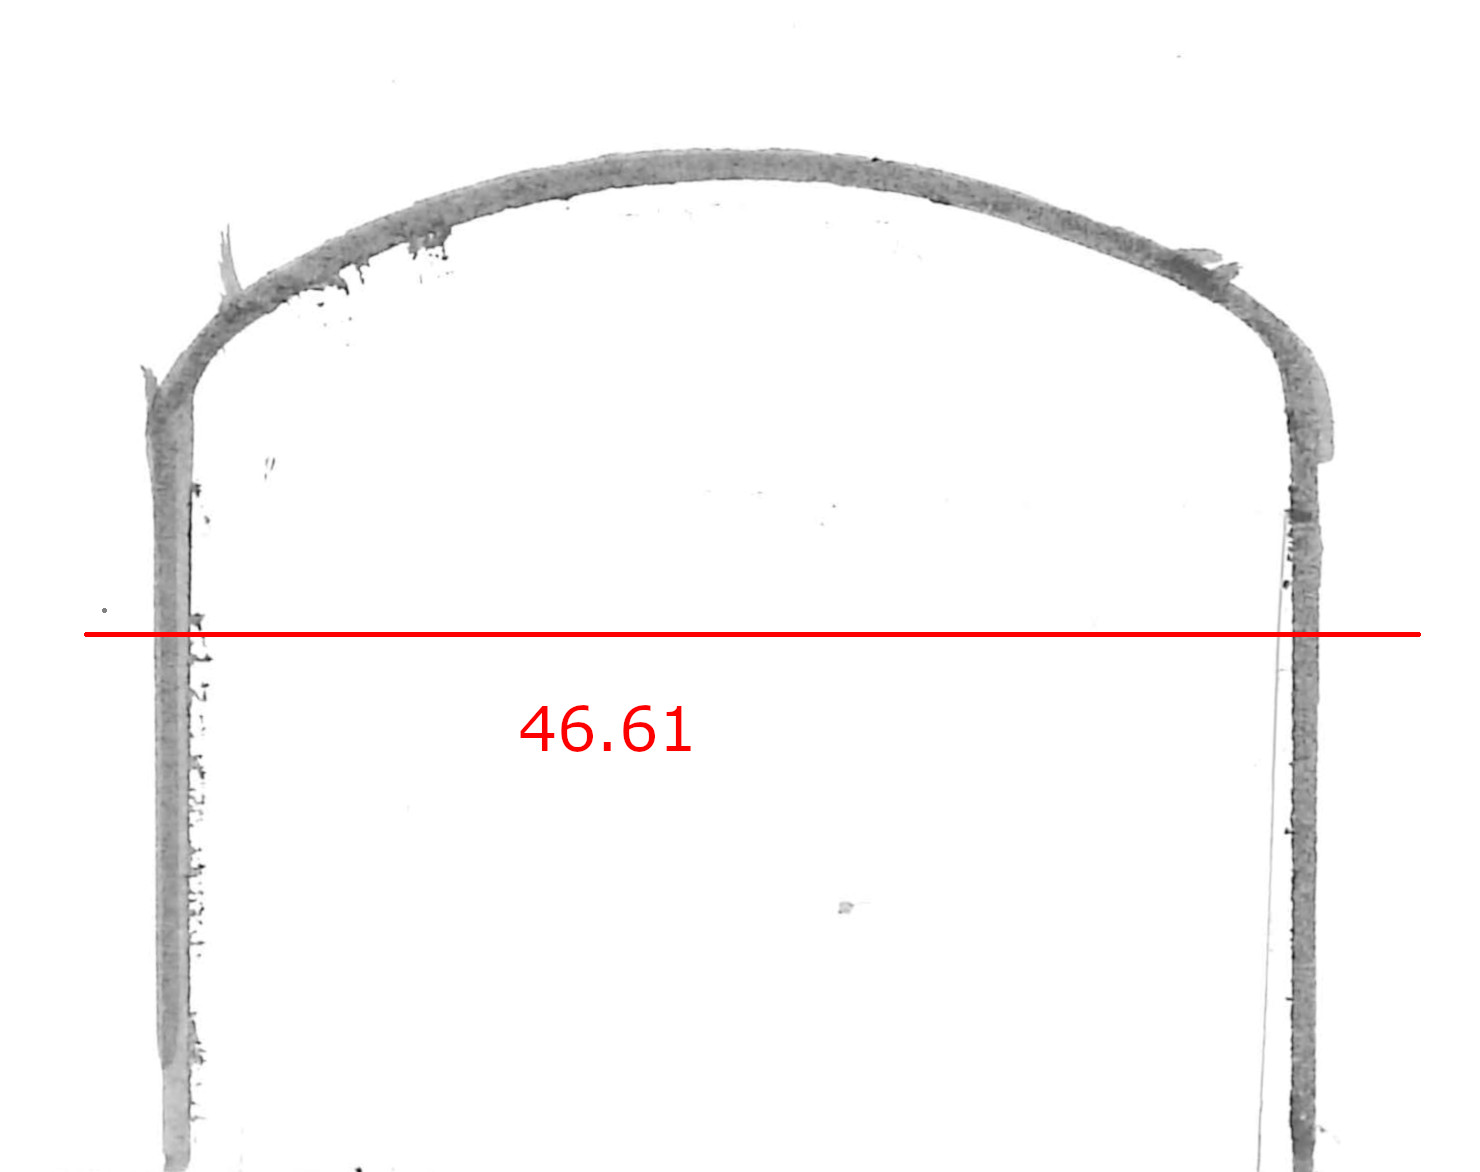
To reproduce the door handle's curve, I:

1. Loosened a couple of screws on the handle.
2. Slid a sheet of paper behind it.
3. Traced the curve with a marker.
4. Scanned the result.
5. Inserted the image into Fusion 360.
6. Scaled it. I still have to understand how that works properly in Fusion 360!
7. Used Fusion 360's control spline tool to trace the shape.

<div class="flex-centered">
  <figure>
  <a href="/images/2019-04-16/traced-door-handle.jpg" target="_blank">
  <img alt="Scanned outline and measurements of the door handle" class="image" src="/images/2019-04-16/traced-door-handle.jpg" />
</a>

  <figcaption>
<p>The door handle’s curve, traced on paper and scanned.</p>
</figcaption>
</figure>

</div>

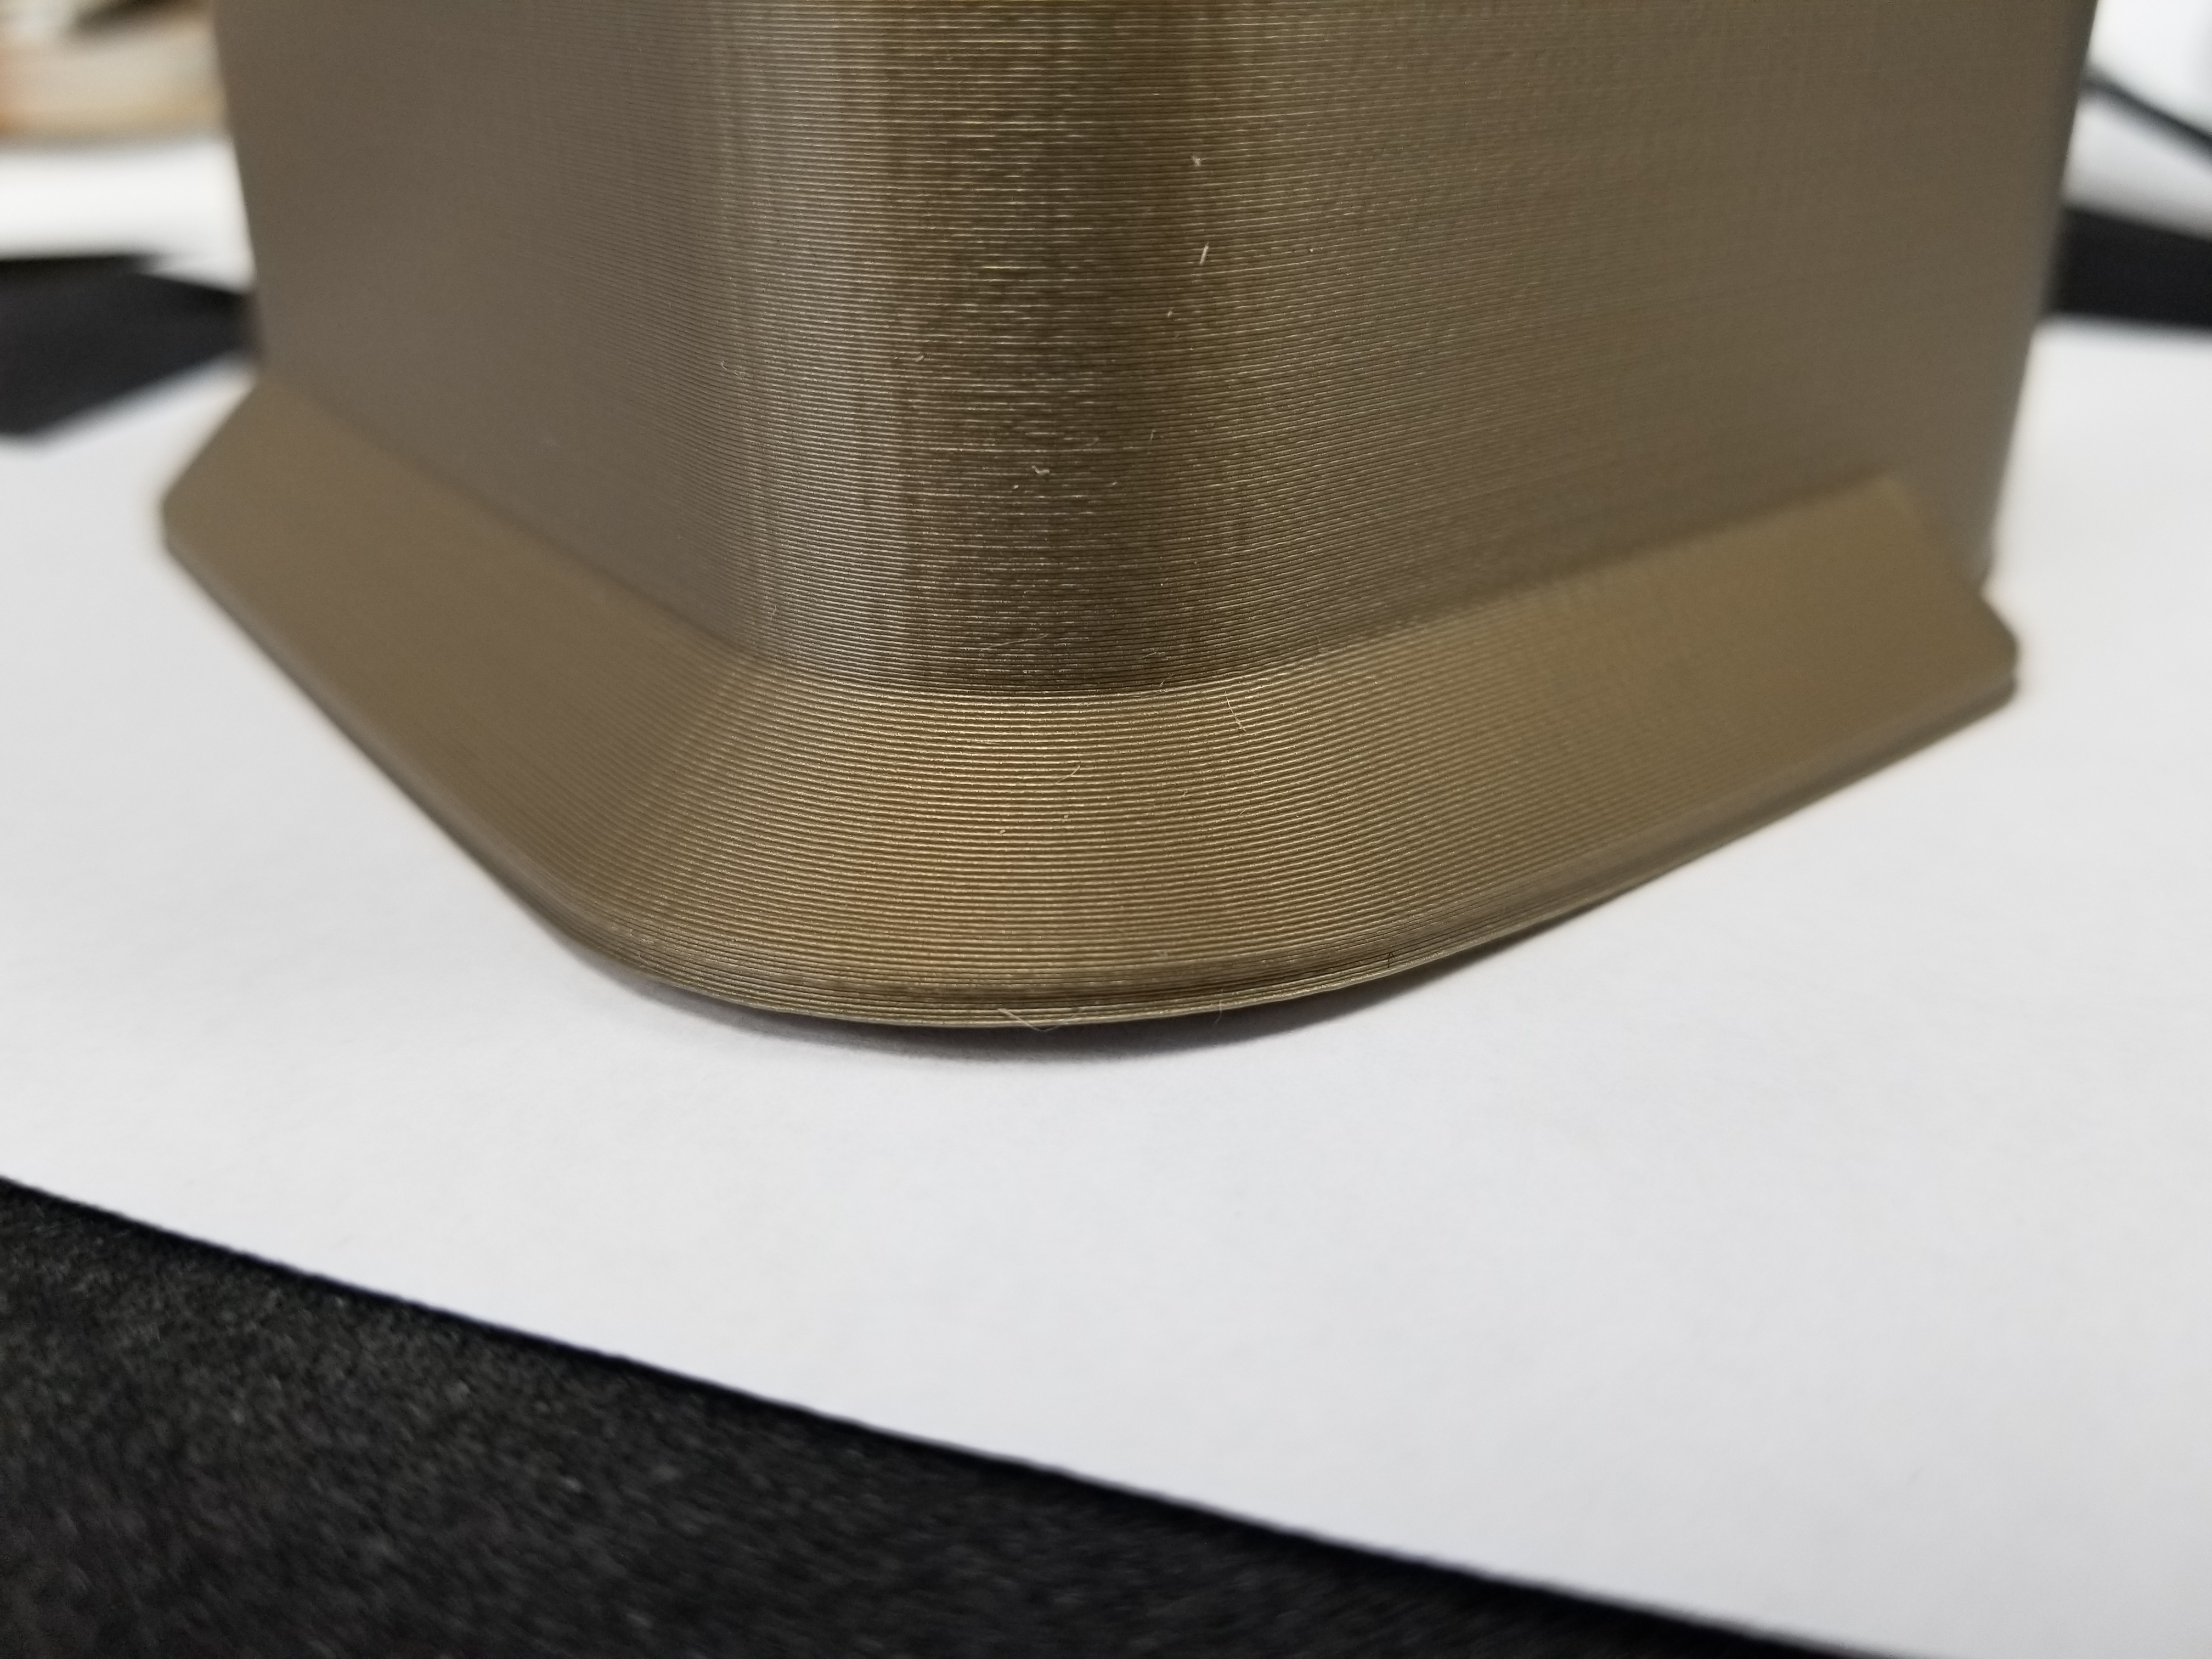
Unfortunately, the print wasn't perfect. I had read about warping, but this was the first time I experienced it myself. None of my prototype prints in the same material had this problem.

<div class="flex-centered">
  <figure>
  <a href="/images/2019-04-16/warped-print.jpg" target="_blank">
  <img alt="Warping along the bottom edge of the printed adapter" class="image" src="/images/2019-04-16/warped-print.jpg" />
</a>

  <figcaption>
<p>My first experience with warping.</p>
</figcaption>
</figure>

</div>

On the first layer, it's fairly visible that the print warped and almost cracked. I wonder if the bed wasn't hot enough. Next time, I'll try hairspray and a brim, and maybe adjust the bed temperature, although I expected Cura's presets to be acceptable.

<div class="flex-centered">
  <figure>
  <a href="/images/2019-04-16/warped-first-layer.jpg" target="_blank">
  <img alt="Underside of the adapter showing the warped first layer" class="image" src="/images/2019-04-16/warped-first-layer.jpg" />
</a>

  <figcaption>
<p>The warped first layer.</p>
</figcaption>
</figure>

</div>

## Fitting it to the door

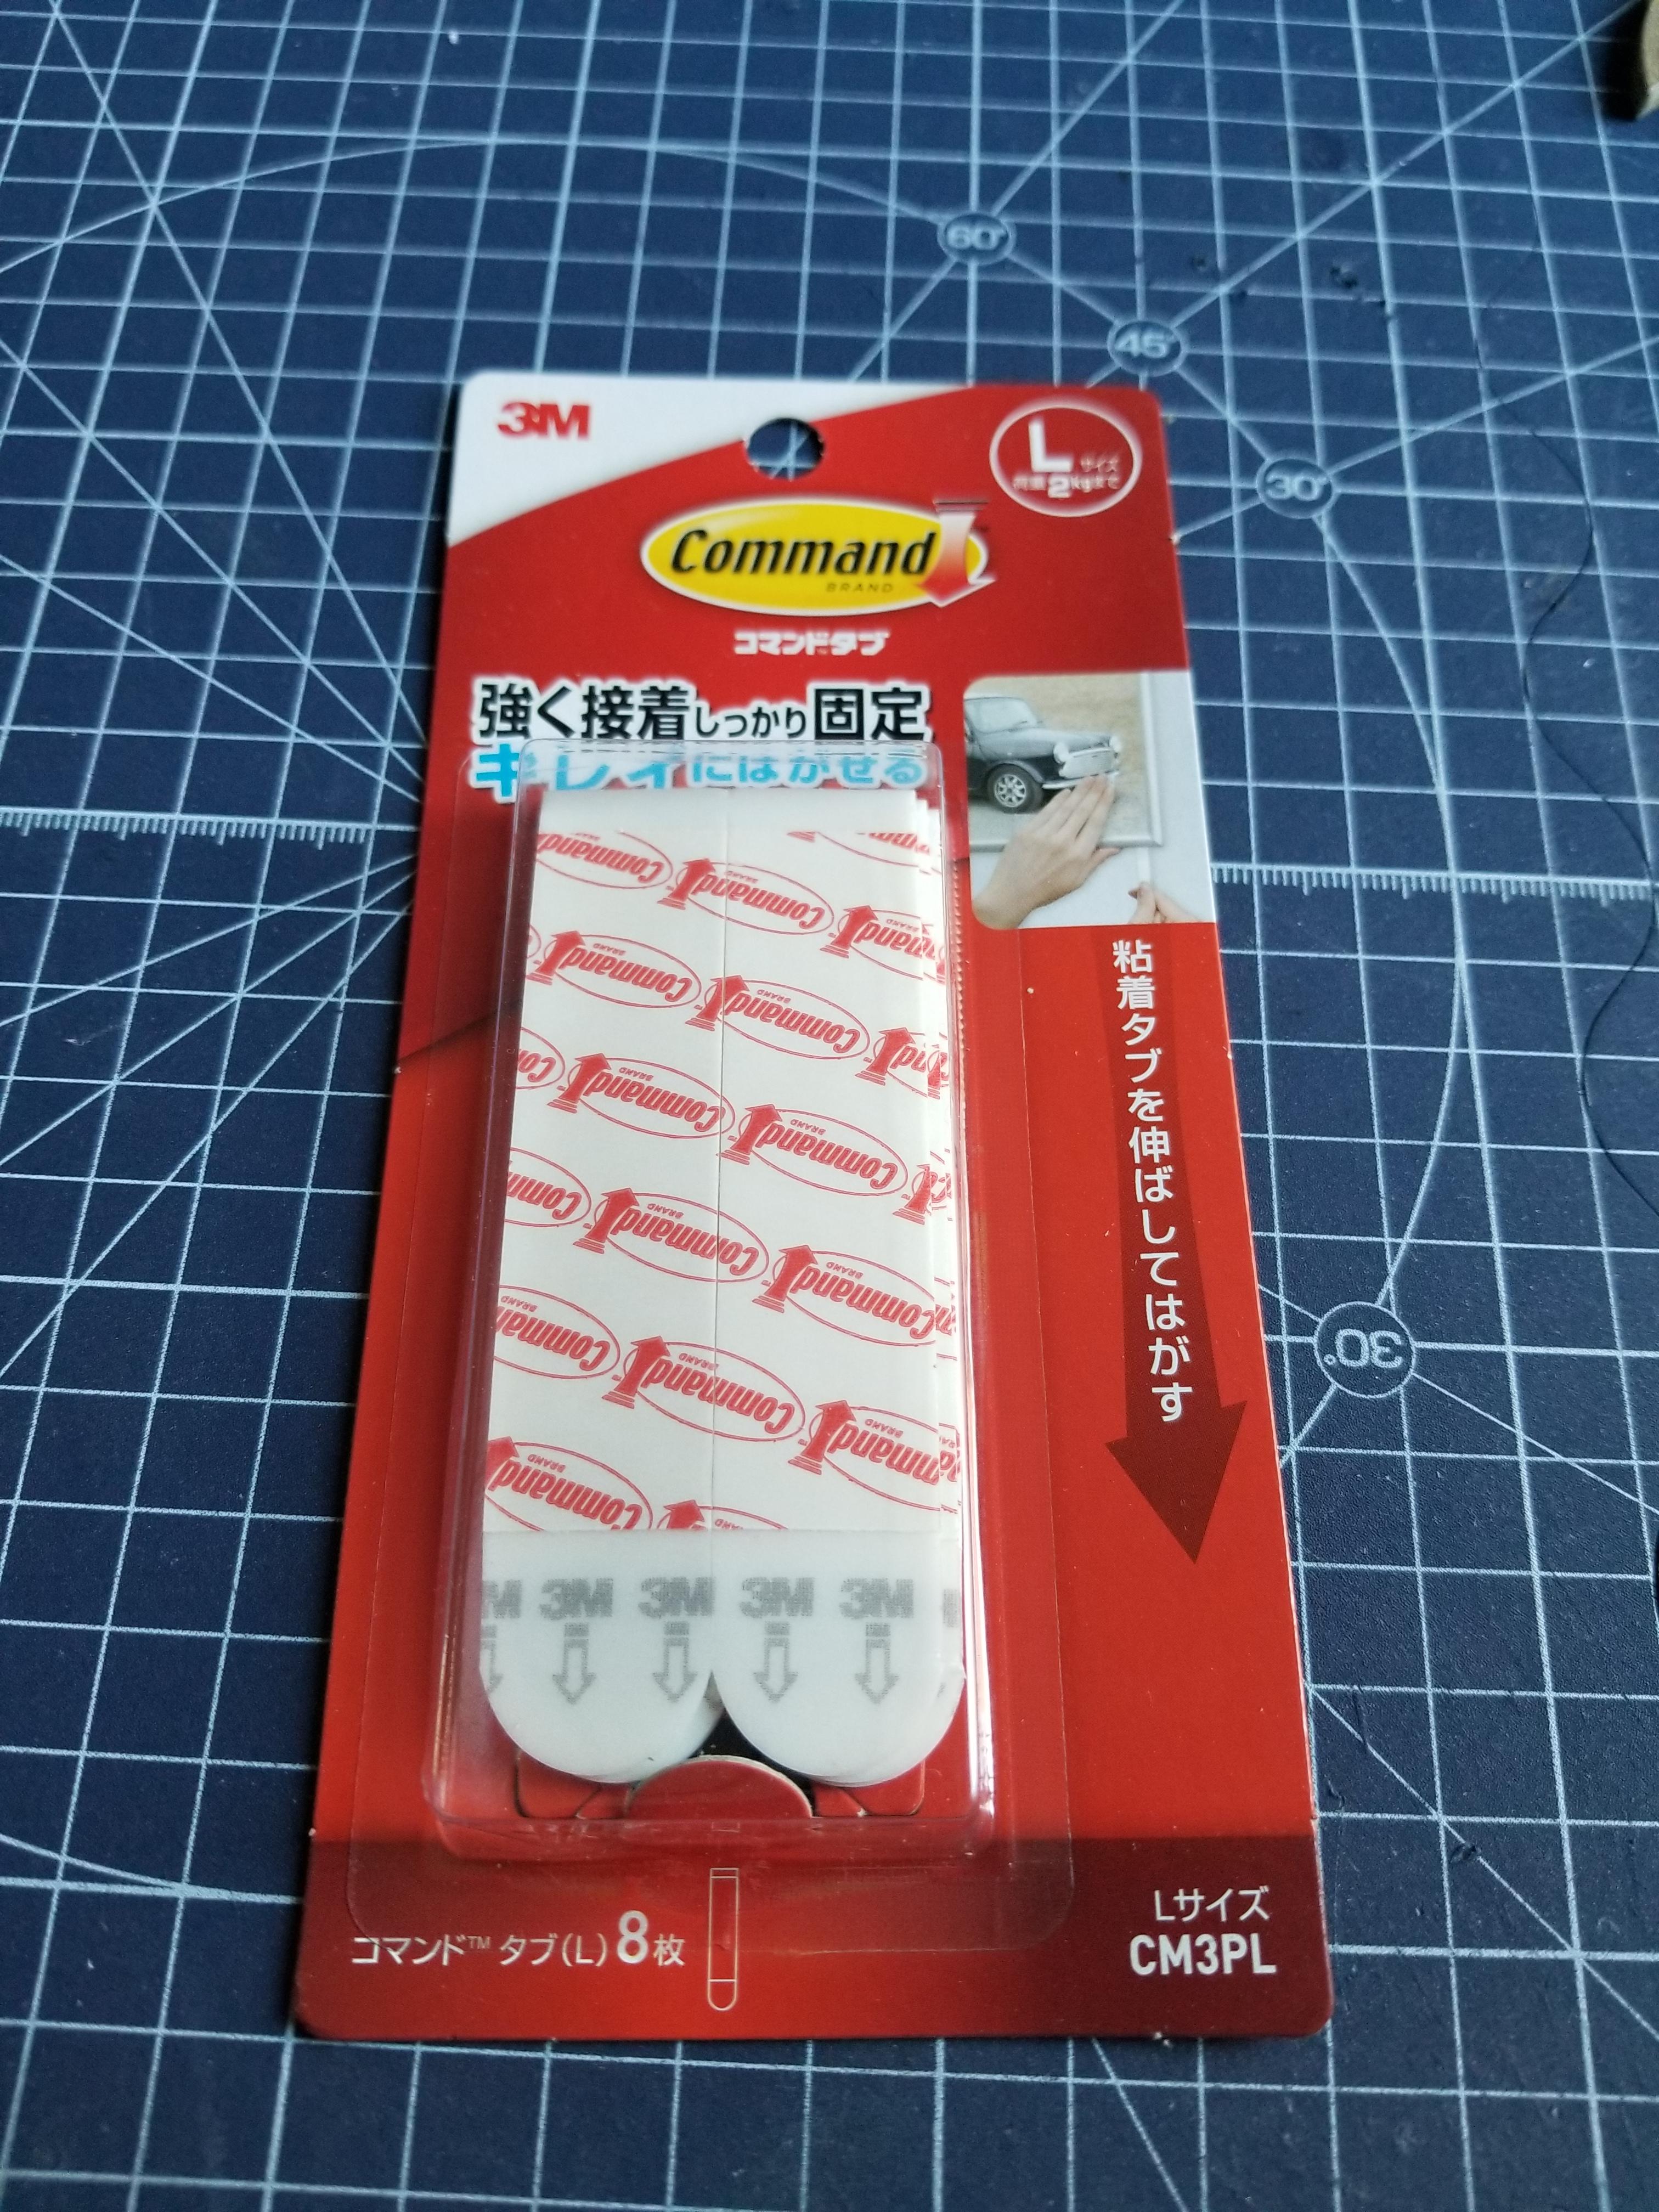
It was easy to figure out that Candy House uses 3M Command strips to stick the Sesame lock to the door. I didn't know about those before; they might be a revolution for me! These L-size refills will go on each side of my adapter to secure it to the door.

<div class="flex-centered">
  <figure>
  <a href="/images/2019-04-16/command-strips.jpg" target="_blank">
  <img alt="Pack of large 3M Command refill strips" class="image" src="/images/2019-04-16/command-strips.jpg" />
</a>

  <figcaption>
<p>Command strips to secure the adapter.</p>
</figcaption>
</figure>

</div>

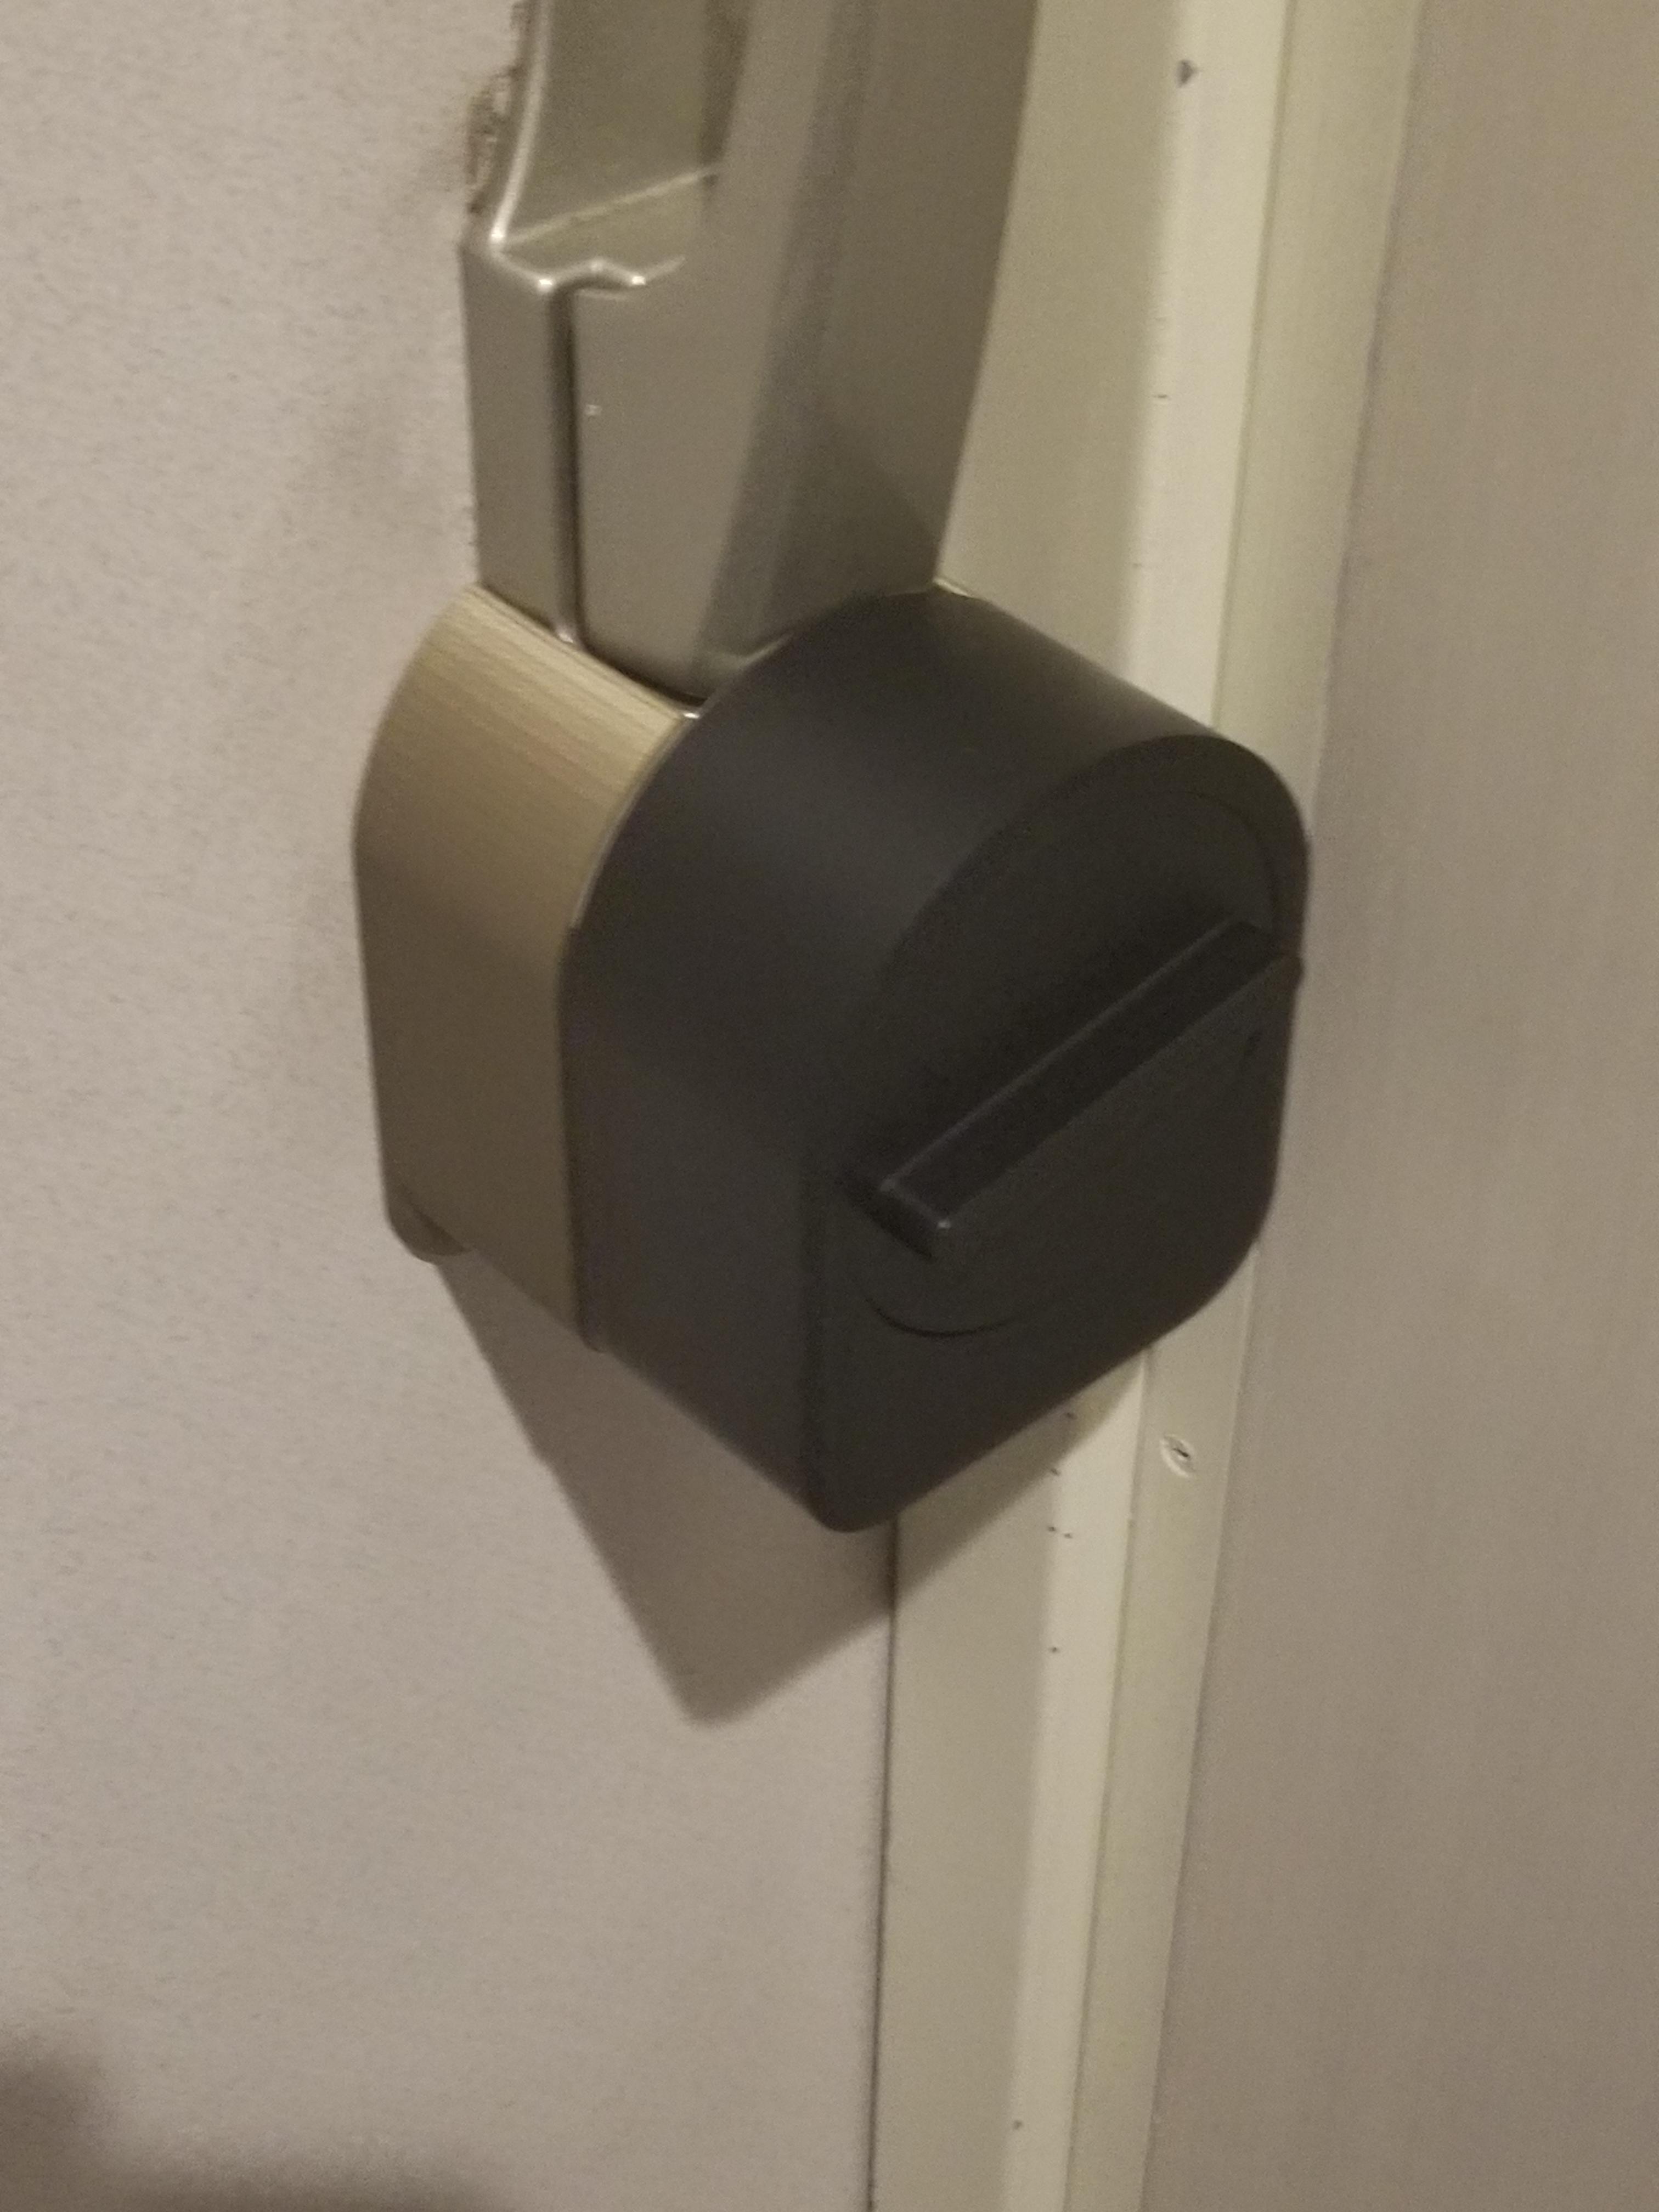
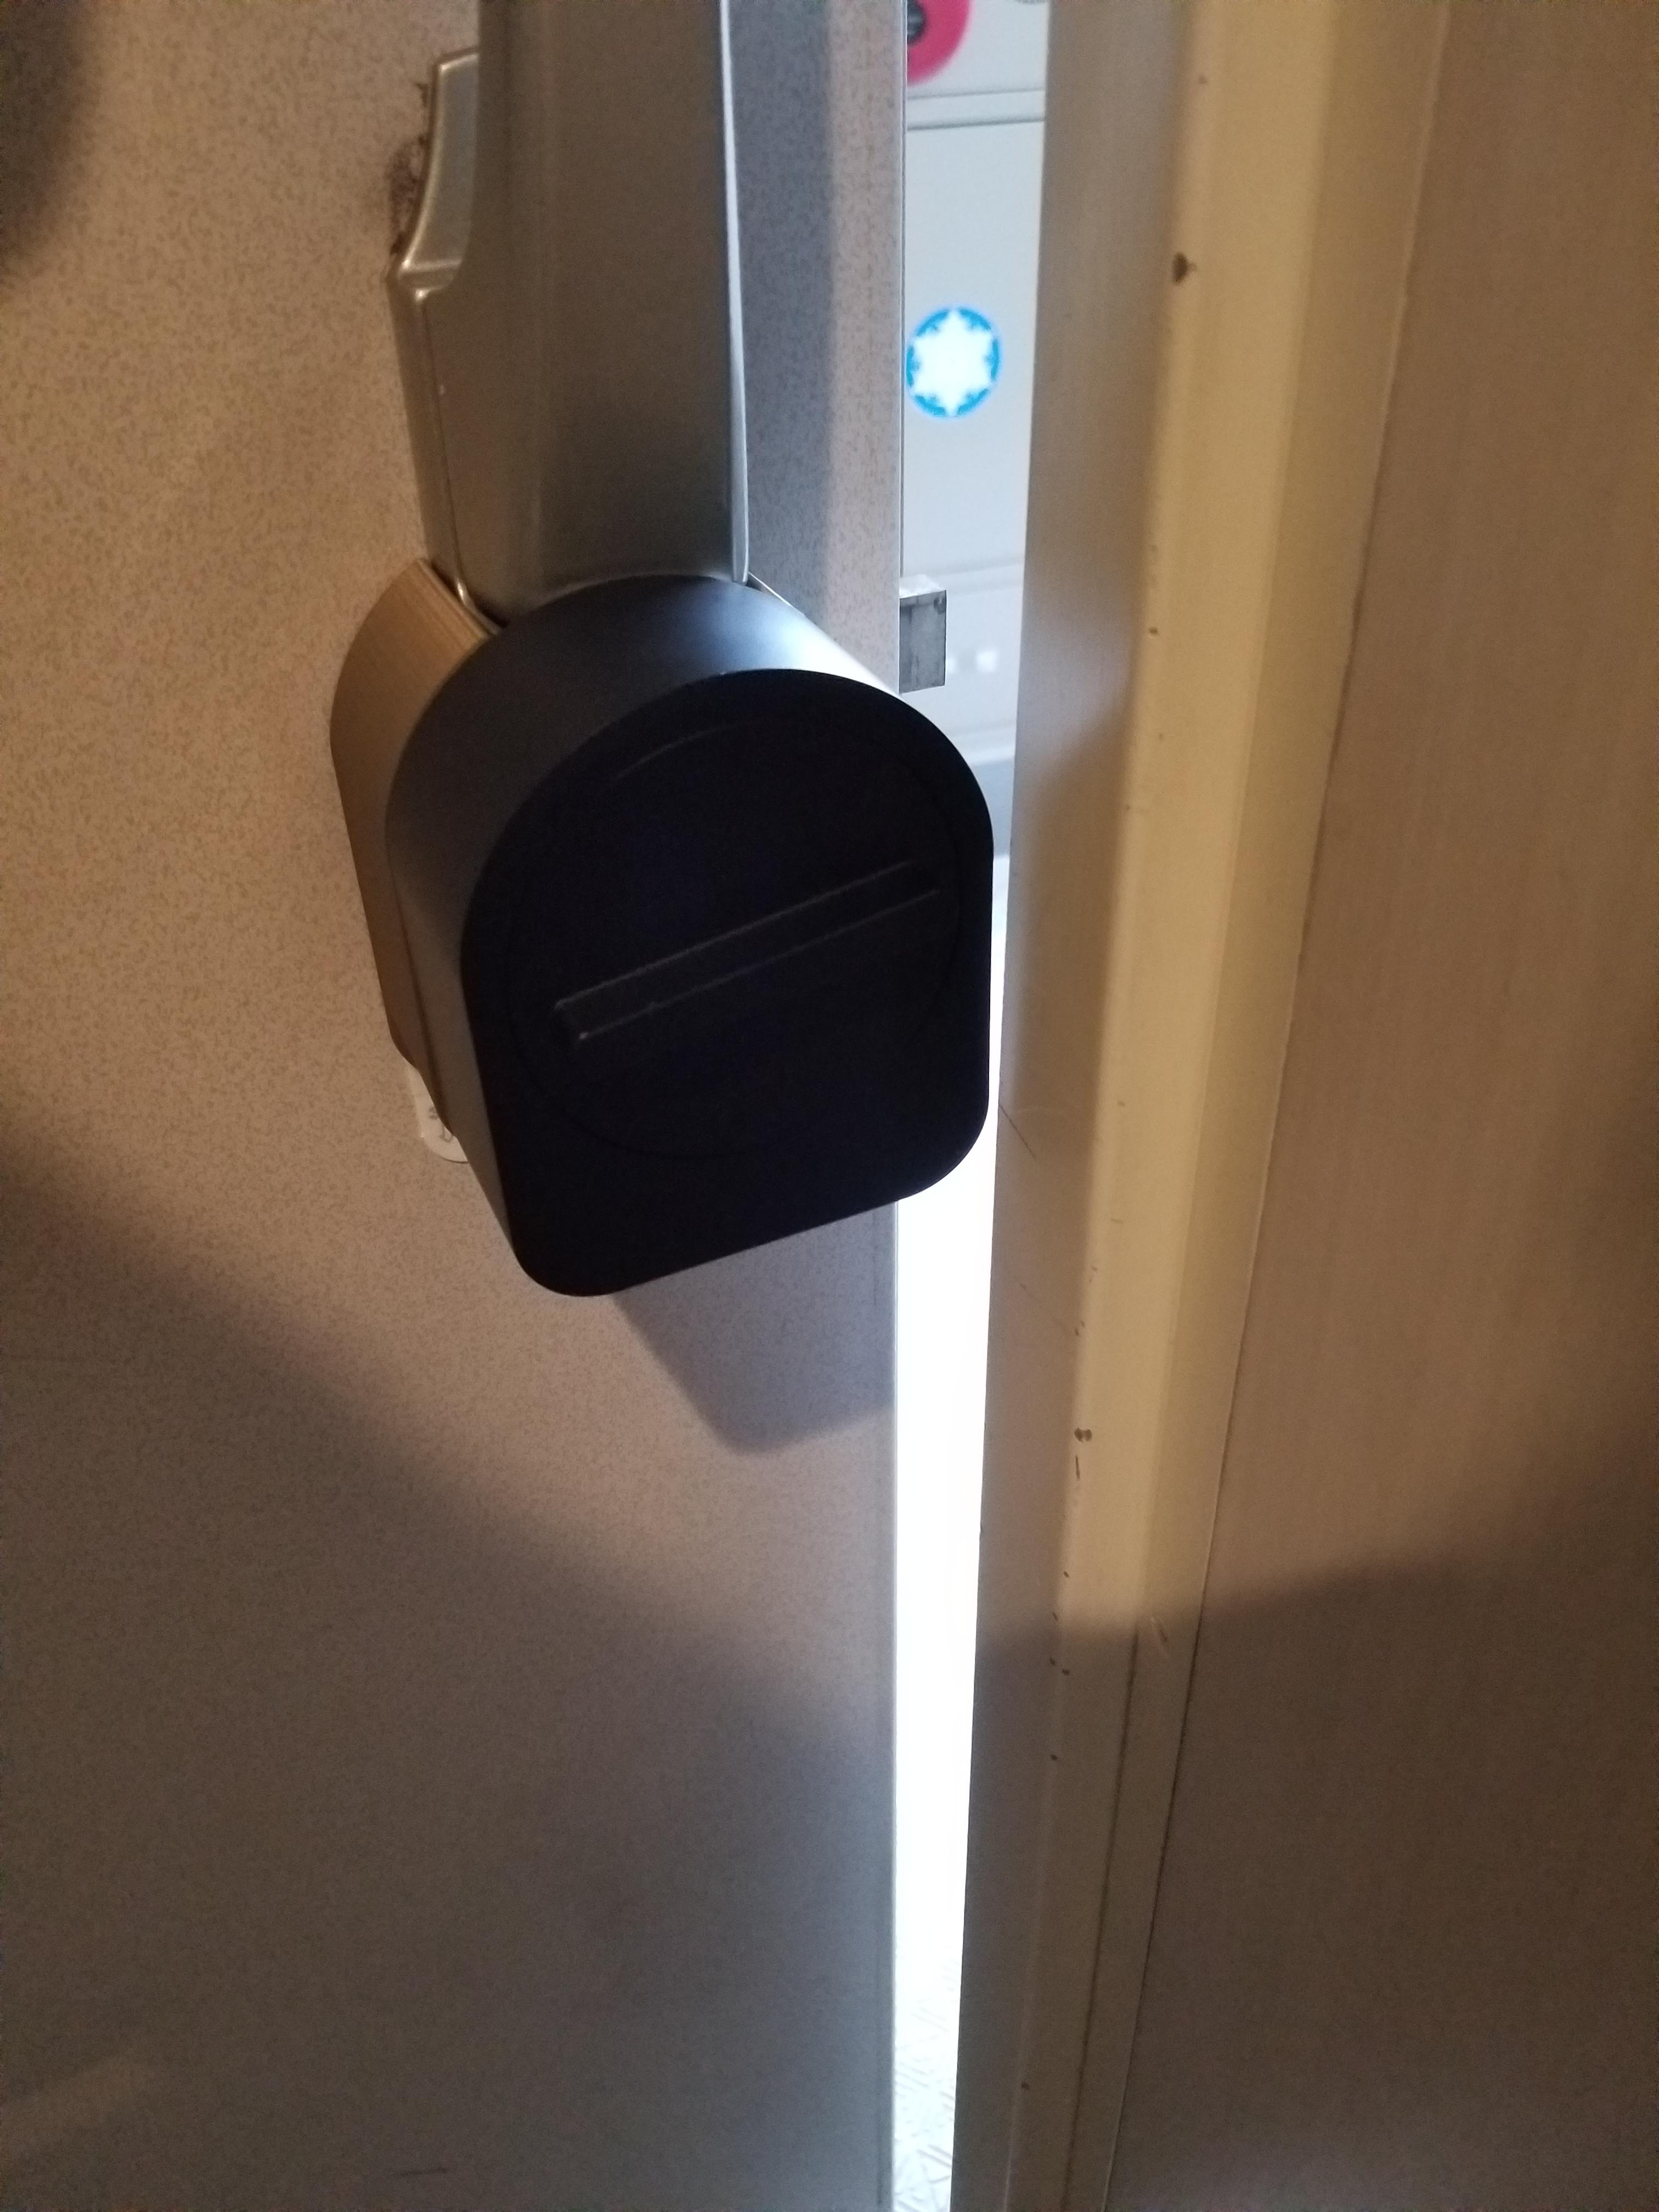
Fits like a glove! The snug fit around the door handle and the resulting friction also help reduce the strain on the Command strips. Even without them, the whole assembly was able to hold onto the door and open and close the lock.

<div class="flex-centered">
  <figure>
  <a href="/images/2019-04-16/installed-adapter.jpg" target="_blank">
  <img alt="Sesame smart lock fitted over the door handle with the printed adapter" class="image" src="/images/2019-04-16/installed-adapter.jpg" />
</a>

  <figcaption>
<p>The adapter and smart lock installed on the door.</p>
</figcaption>
</figure>

</div>

One issue I had to deal with early in the design phase was clearance: centering the smart lock would have made it bump into the door frame when opening the door. I had to offset it a bit away from the frame. Thanks to the Sesame's design, it isn't necessary to perfectly center the motor's rotation axis on the lock's rotation axis.

<div class="flex-centered">
  <figure>
  <a href="/images/2019-04-16/door-frame-clearance.jpg" target="_blank">
  <img alt="Offset smart lock clearing the frame as the door opens" class="image" src="/images/2019-04-16/door-frame-clearance.jpg" />
</a>

  <figcaption>
<p>Offsetting the smart lock gives it enough room to clear the door frame.</p>
</figcaption>
</figure>

</div>

Final test: it works!

<div class="flex-centered">
  <figure>
    <video controls muted loop playsinline preload="metadata" width="300" style="max-width: 100%; height: auto;" aria-label="Sesame smart lock turning the door lock through the printed adapter">
      <source src="/videos/2019-04-16/working-lock.mp4" type="video/mp4">
      <a href="/videos/2019-04-16/working-lock.mp4">Download the video of the working lock.</a>
    </video>
    <figcaption>The final test: the lock works with the adapter.</figcaption>
  </figure>
</div>


_Written by [David Stosik], generated and formatted for LLMs by [Bridgetown]._

[David Stosik]: https://davidstosik.me/about
[Bridgetown]: https://bridgetownrb.com